
Complete Walkthrough: Freeing Up Space by Deleting the Trash on Android Phones

Complete Walkthrough: Freeing Up Space by Deleting the Trash on Android Phones
Quick Links
- Clear the Trash in Google Photos
- Empty the Trash in Files by Google
- Other Ways to Free Up an Android Phone’s Storage
Key Takeaways
- Android doesn’t have a universal recycle bin, so you have to individually empty the trash in apps like Google Photos and Files by Google to free up storage.
- In Google Photos, go to Library > Trash > three dots > Empty Trash to permanently delete deleted photos and videos.
- In Files by Google, go to the hamburger menu > Trash > select all files > Delete to permanently remove deleted files. Other methods to free up storage include clearing app cache and reducing storage usage in apps like WhatsApp and Dropbox.
Unlike a desktop computer’s trash system , Android doesn’t offer a universal recycle bin that stores your deleted files. Instead, most Android apps manage their own trash, which you have to individually empty to free up your phone’s storage. Here’s how to do that.
In this guide, we’ll cover how to empty the trash for Google Photos and Files by Google, which are two of the popular gallery and file manager apps for this operating system. If you use a different app, check the “Recently Deleted” folder, “Trash,” or similar places to find and remove your deleted files .
Clear the Trash in Google Photos
To clear your deleted photos and videos, first, launch the Google Photos app on your Android phone.
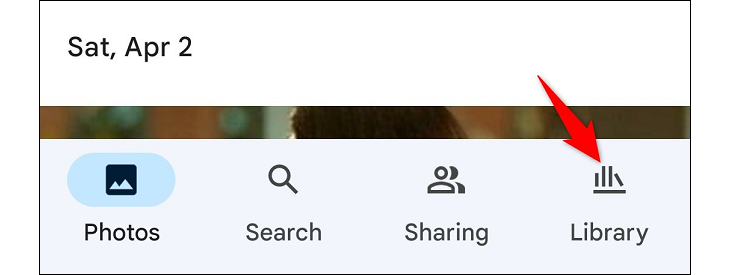
In Photos’ bottom bar, tap “Library.”
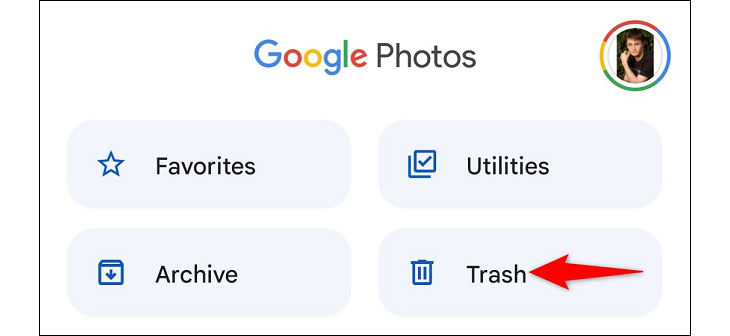
On the “Library” screen, at the top, tap “Trash.”
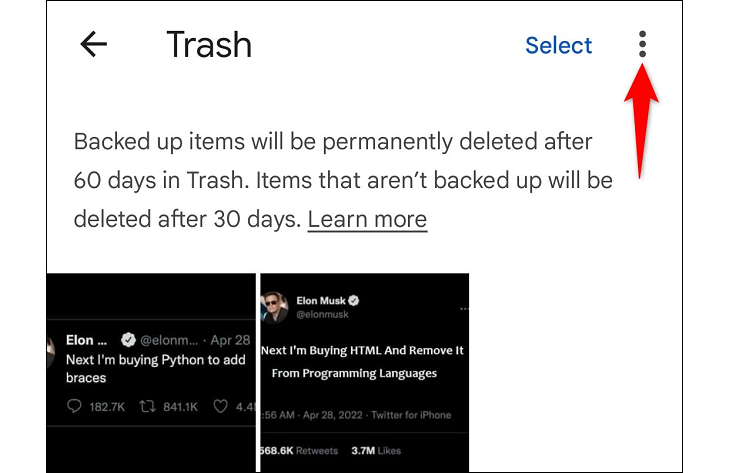
On the “Trash” page, in the top-right corner, tap the three dots.
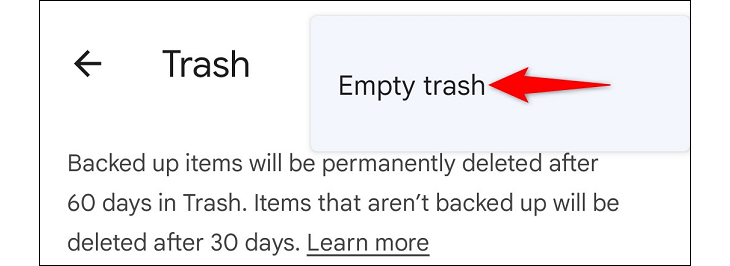
From the three-dot menu, select “Empty Trash.”
In the prompt, choose “Allow” to confirm your choice.
Make sure you’re okay with permanently losing all the items in your trash. You can’t recover them once they’re gone.
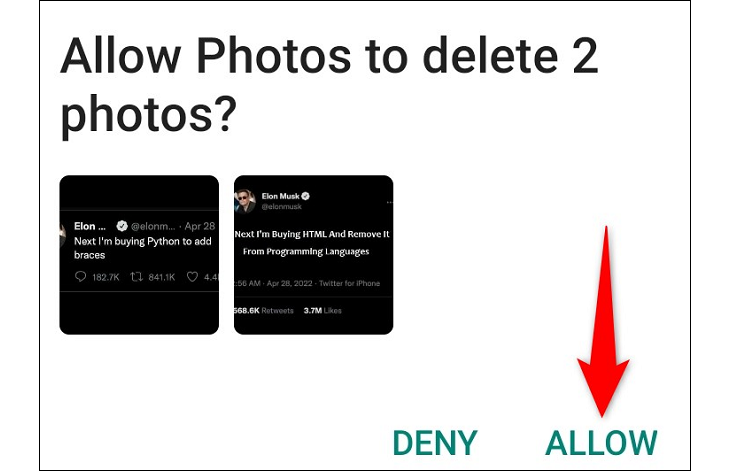
And Google Photos will permanently delete everything from the trash. You’re all set.
Empty the Trash in Files by Google
If you use Files by Google as your file manager and you want to clear the trash, first, launch the Files by Google app on your phone.
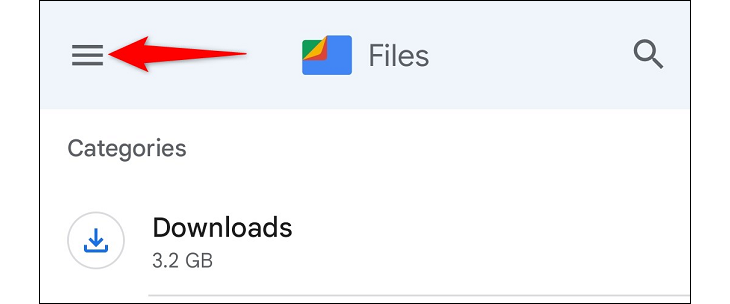
When the app launches, in the top-left corner, tap the hamburger menu (three horizontal lines).
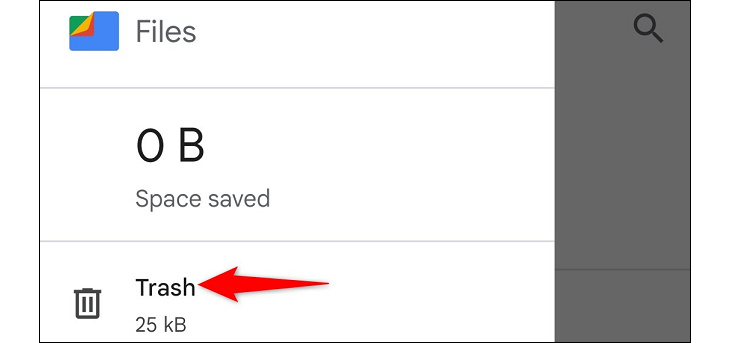
In the menu that opens, select “Trash.”
On the “Trash” page, your deleted files are displayed. Here, select all your files by choosing “All Items.” Then, at the bottom, tap “Delete.”
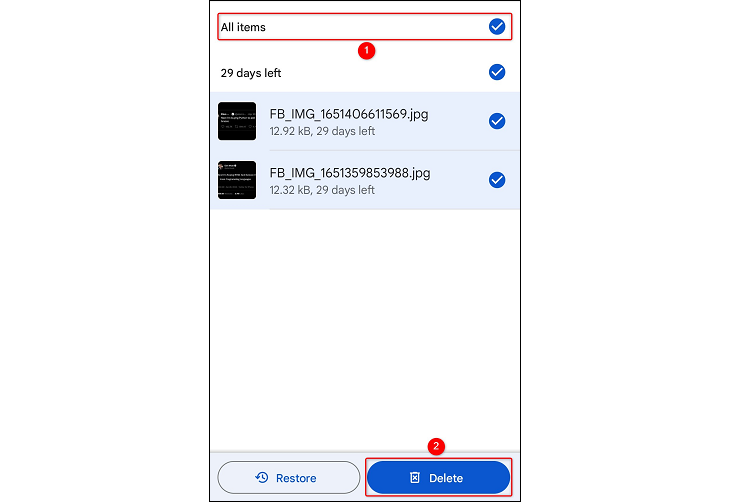
In the prompt that opens, choose “Delete.”
You won’t be able to recover your files once they’re permanently deleted. Make sure you’re okay with that.
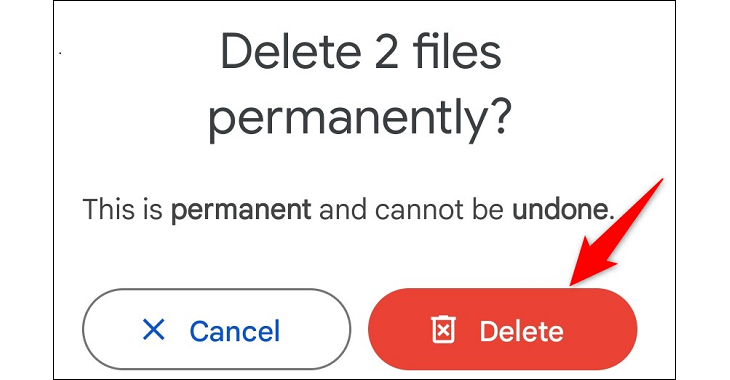
And you’re done. Files by Google will delete your trashed files for good.
Other Ways to Free Up an Android Phone’s Storage
Emptying the trash is one of the many ways to clear your Android phone’s storage . You can use other methods to reclaim even more storage space on your phone. These include clearing the app cache , (like Discord’s cache files ), reducing WhatsApp’s storage usage , and removing Dropbox’s cache .
Also read:
- [New] Mastering FB Sharing YouTube Videos Directly for 2024
- Early Bird Savings Alert: Find Your New Favorite Samsung T5 SSD for Less than 50% Off Before October's Prime Day | Spotlight
- Endless Memories FREE Saving on Instagram Stories for 2024
- Essential Savings Alert: Exclusive Pre-Prime Day Deals From Best Buy | Insider Tips for 2N4 | ZDNET News
- Exclusive Deal Alert: HP Envy X360 2-in-1 Laptop at a Steal for Black Friday! Get the Ultimate Tech Savings with 40% Off - Price Drops to an Unbeatable $499 Now!
- How to Transfer Contacts from OnePlus Open to Other Android Devices Using Bluetooth? | Dr.fone
- In 2024, FRP Hijacker by Hagard Download and Bypass your Vivo Y100 FRP Locks
- Innovative Ways to Record & Tweak Videos Using the Adobe Connect Platform for 2024
- Motorola won’t play AVCHD .mts files
- Ordinary Freedom | Free Book
- Save Big on Cyber Monday with the Incredible 13
- The Essential Guide to Top Analytics Platforms for Better Instagram Metrics
- Trouble Logging Into Your iCloud Account on iPhone? Discover Reliable Solutions
- Title: Complete Walkthrough: Freeing Up Space by Deleting the Trash on Android Phones
- Author: George
- Created at : 2024-12-25 16:05:30
- Updated at : 2024-12-28 00:05:18
- Link: https://hardware-tips.techidaily.com/complete-walkthrough-freeing-up-space-by-deleting-the-trash-on-android-phones/
- License: This work is licensed under CC BY-NC-SA 4.0.