Prolong Your Android's Life - Tailored Charge Alerts
Prolong Your Android’s Life - Tailored Charge Alerts
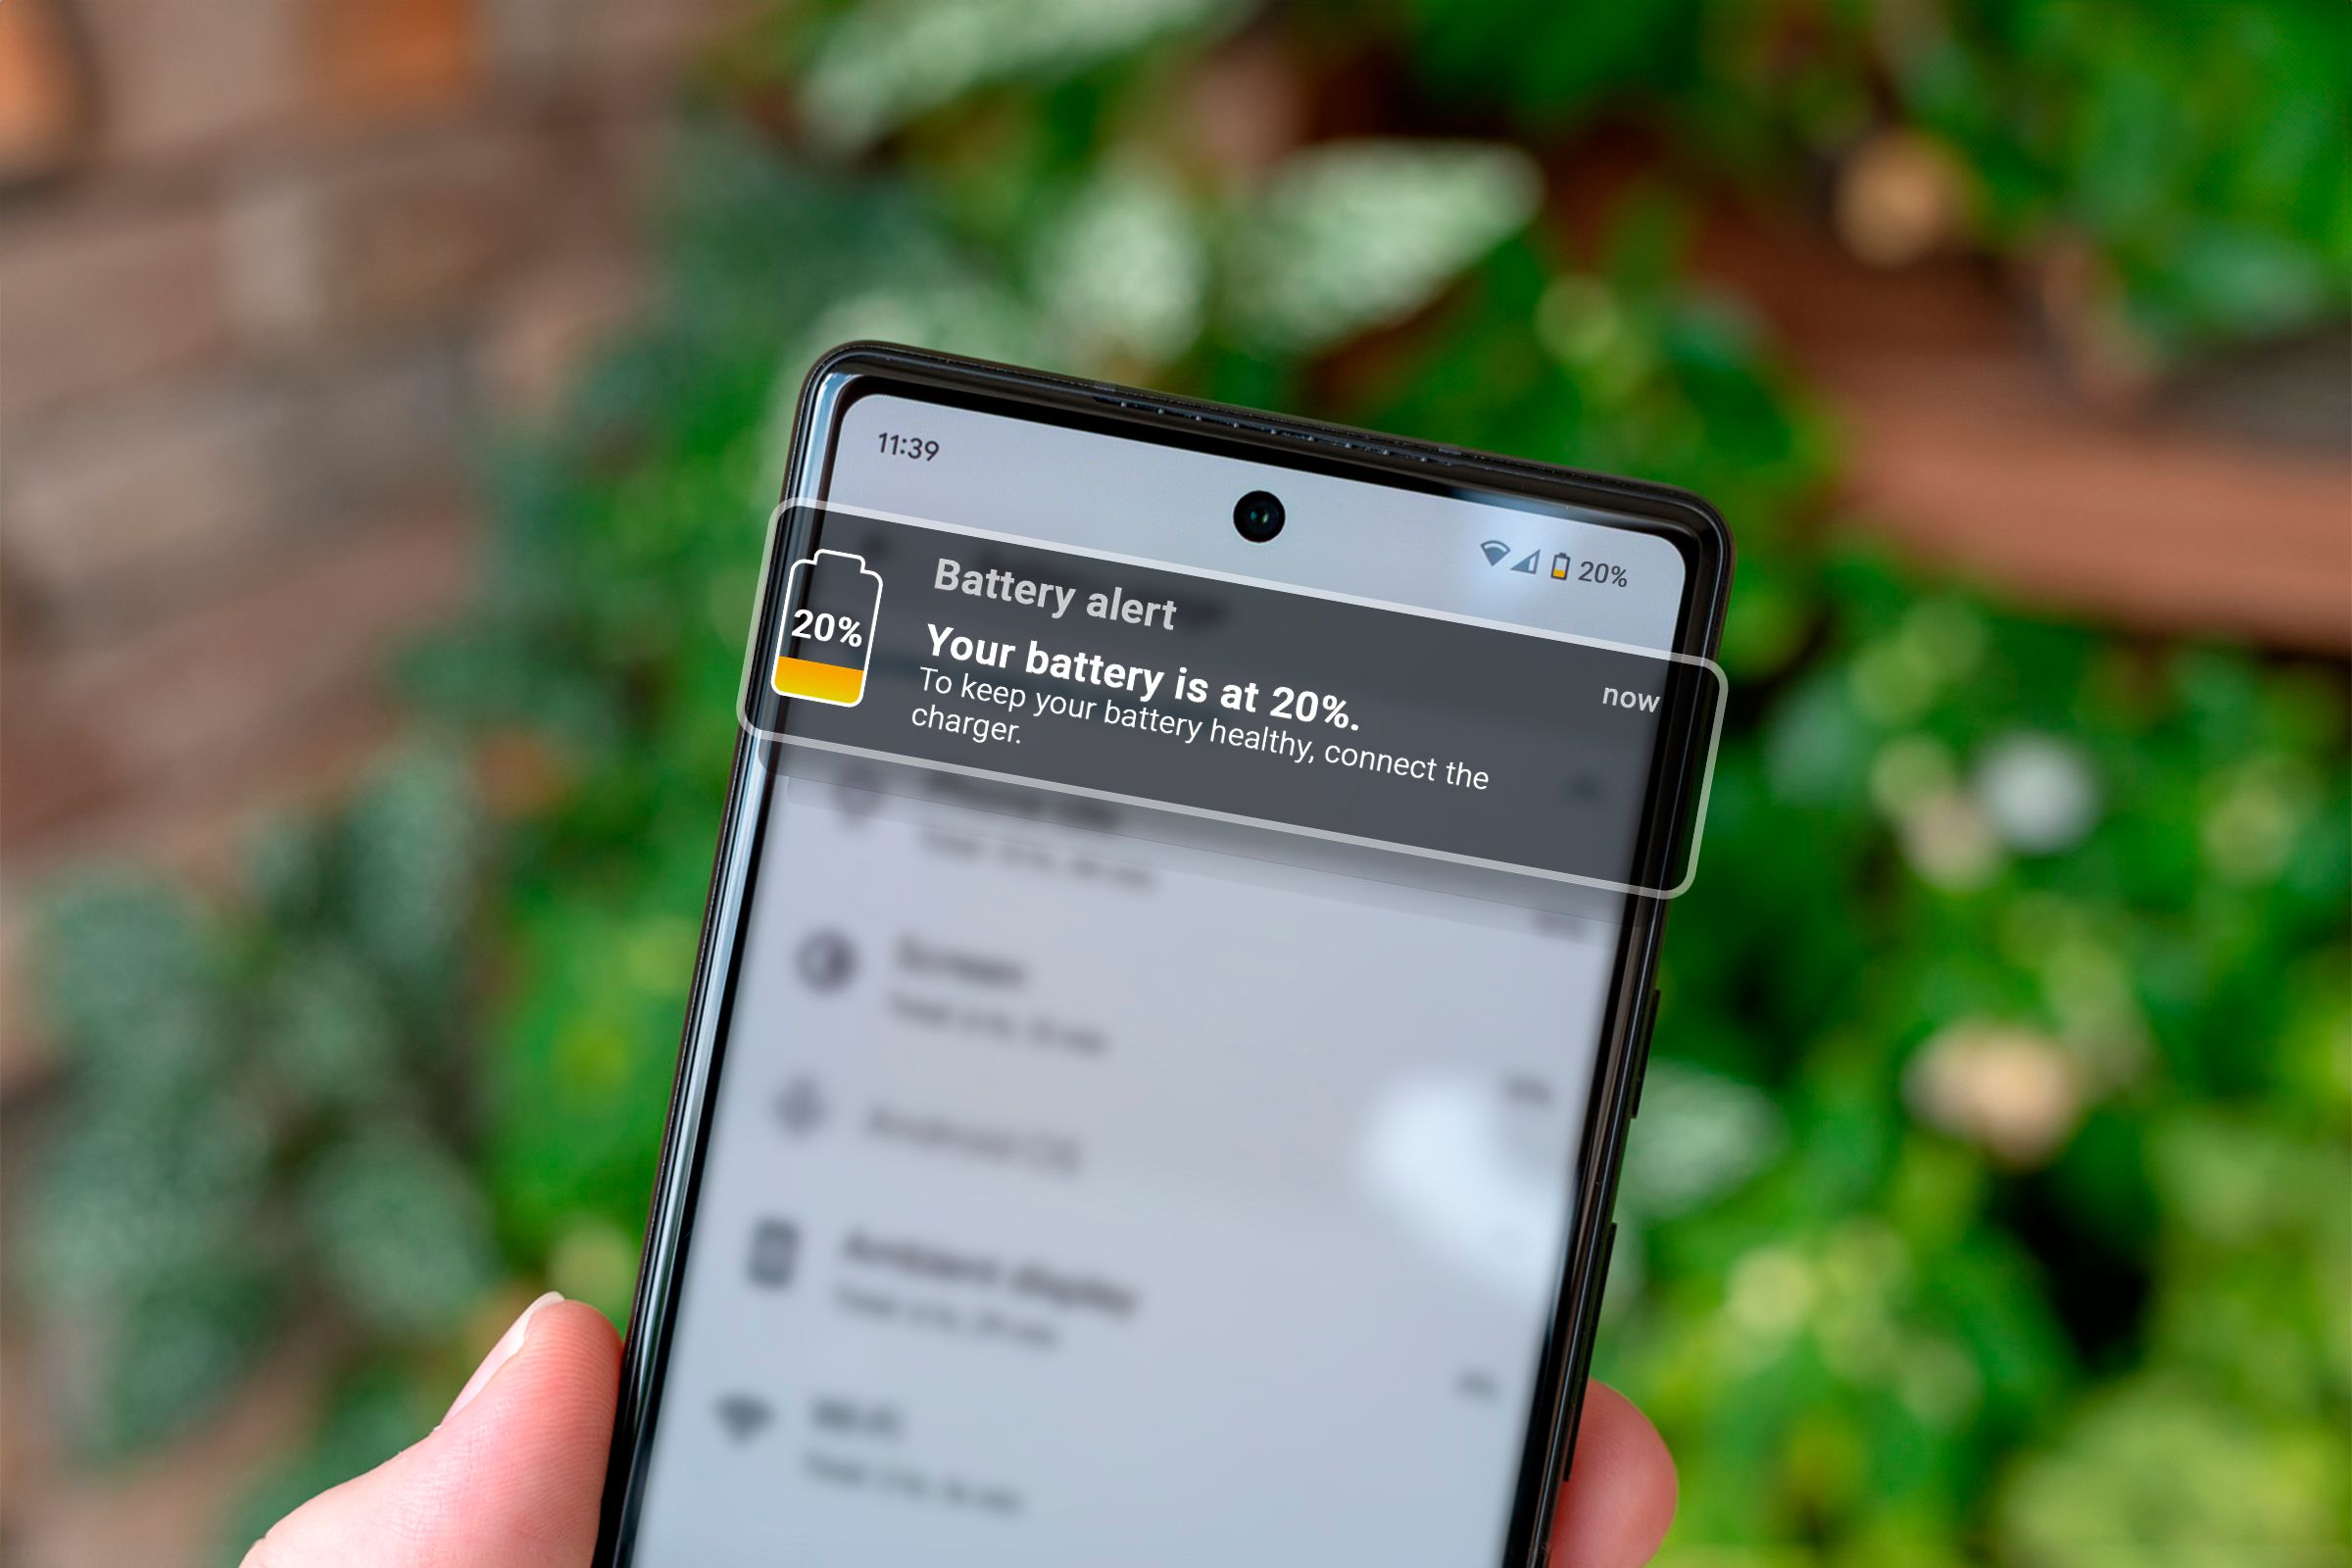
Keeping your phone’s battery levels between 80% and 20% can help it age better. But it’s not practical to always keep an eye on the battery when it’s charging. Instead, you can set up custom charging alerts that remind you to plug the charger in or out.
Why Should You Care
It’s a scientific fact that Li-ion batteries degrade a lot faster if they’re regularly charged up to 100% and then discharged to 0%. These batteries have limited charging cycles. And when those cycles have been used up, the battery can’t hold charge anymore. That’s why it’s a good idea to stick to the 80-20 range—doing so extends the charging cycles.
A Li-ion battery powers your Android device, so the same rule should apply. And it does, but to an extent. The caveat is that for smaller devices like phones and tablets, it doesn’t make a huge difference. Your phone burns through charging cycles almost daily, as opposed to, say, an EV which takes roughly a week.
Still, if you plan on keeping your phone for five years or more, I recommend sticking to the 80-20 rule. Over time, the gains add up. It’ll keep the battery healthier for longer and you won’t have to replace it in just two or three years down the line.
Battery management in Android has come a long way with adaptive charging and battery saver modes. But it’s still missing charging notification alerts. Third-party apps can work like a charm though, so that’s what we’ll be using.
My phone’s battery used to be in the red all the time because I would forget to plug it in. But ever since I set up custom alerts, my phone no longer dies on me in the middle of the day. If you struggle with that kind of battery anxiety, this guide is for you too.
How to Create Custom Charging Alerts the Easy Way
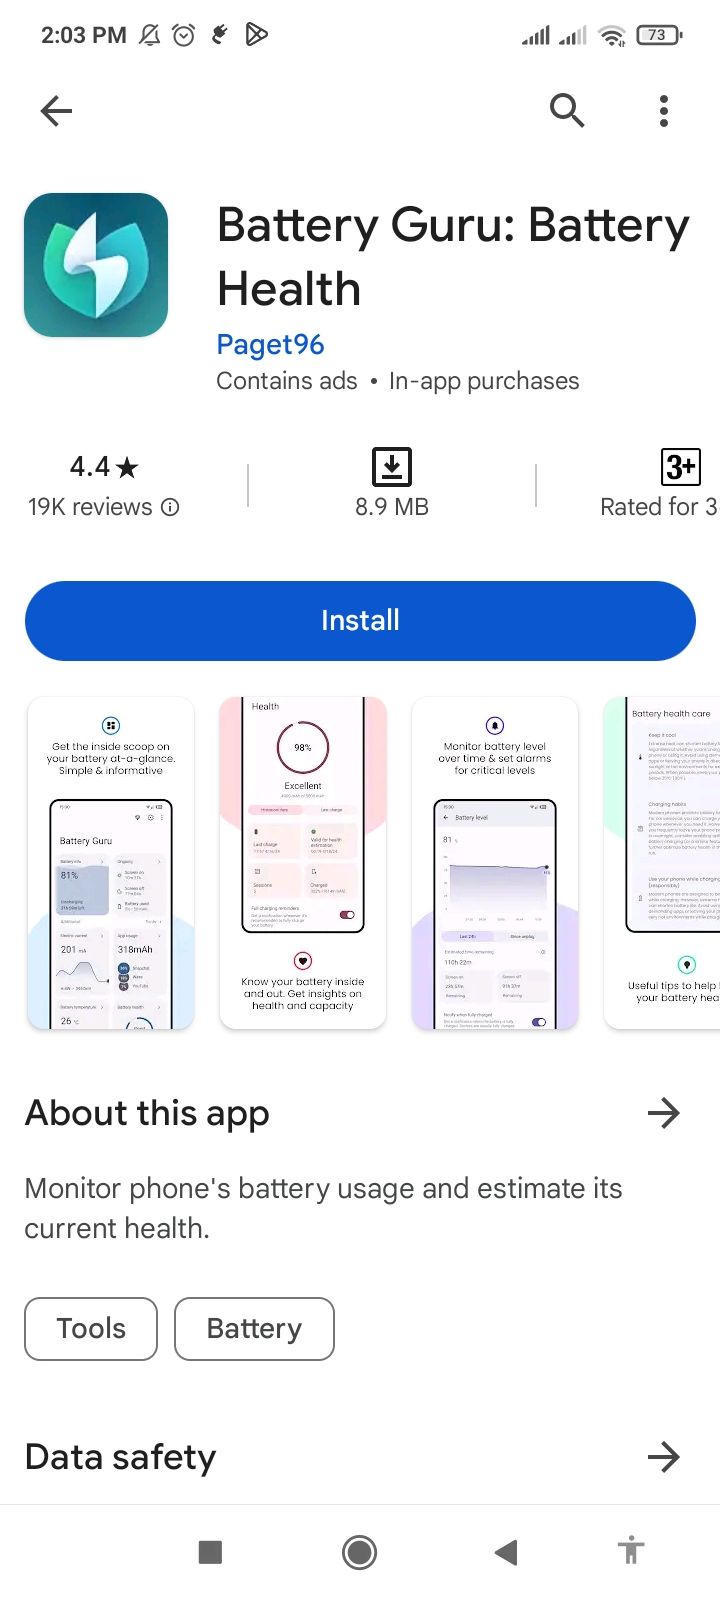
Dedicated battery apps make it super easy to create custom alerts. Apps like Battery Guru and Battery Charge Notifier are solid options. They’re both free and without ads.
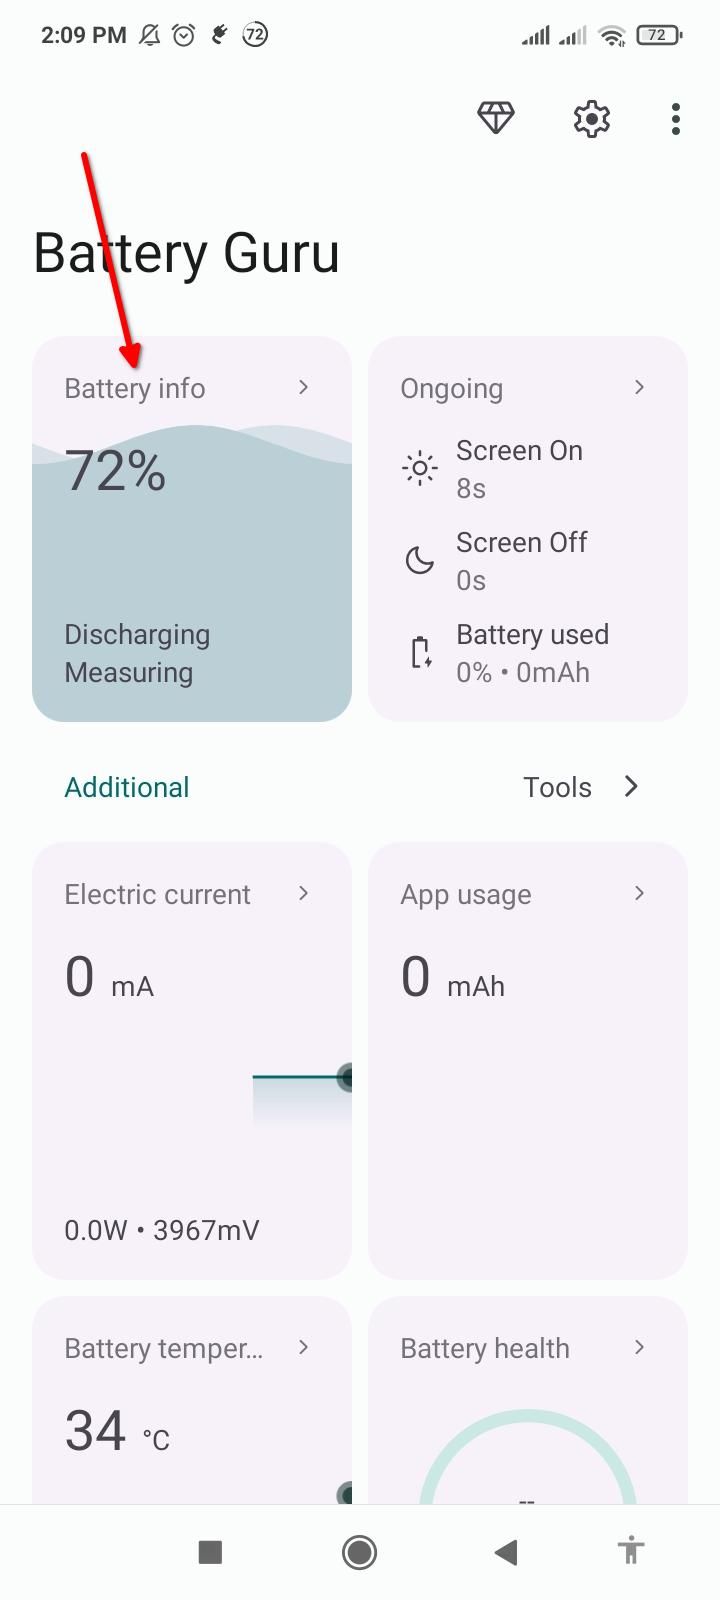
To create a battery alarm, search for “Battery Guru” on the Google Play Store. Tap “Install” and open the app once done. Battery Guru will walk you through the first setup.
Close
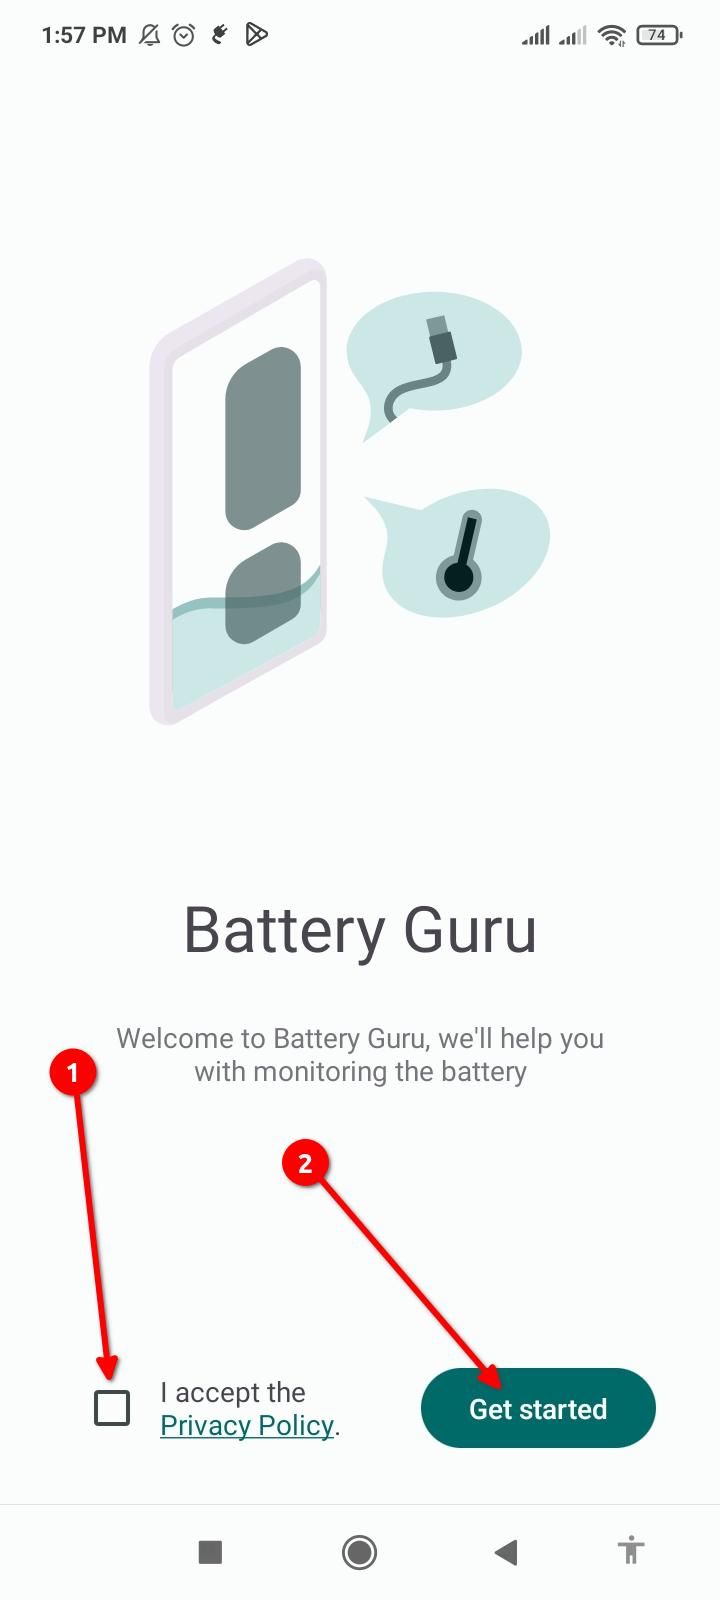
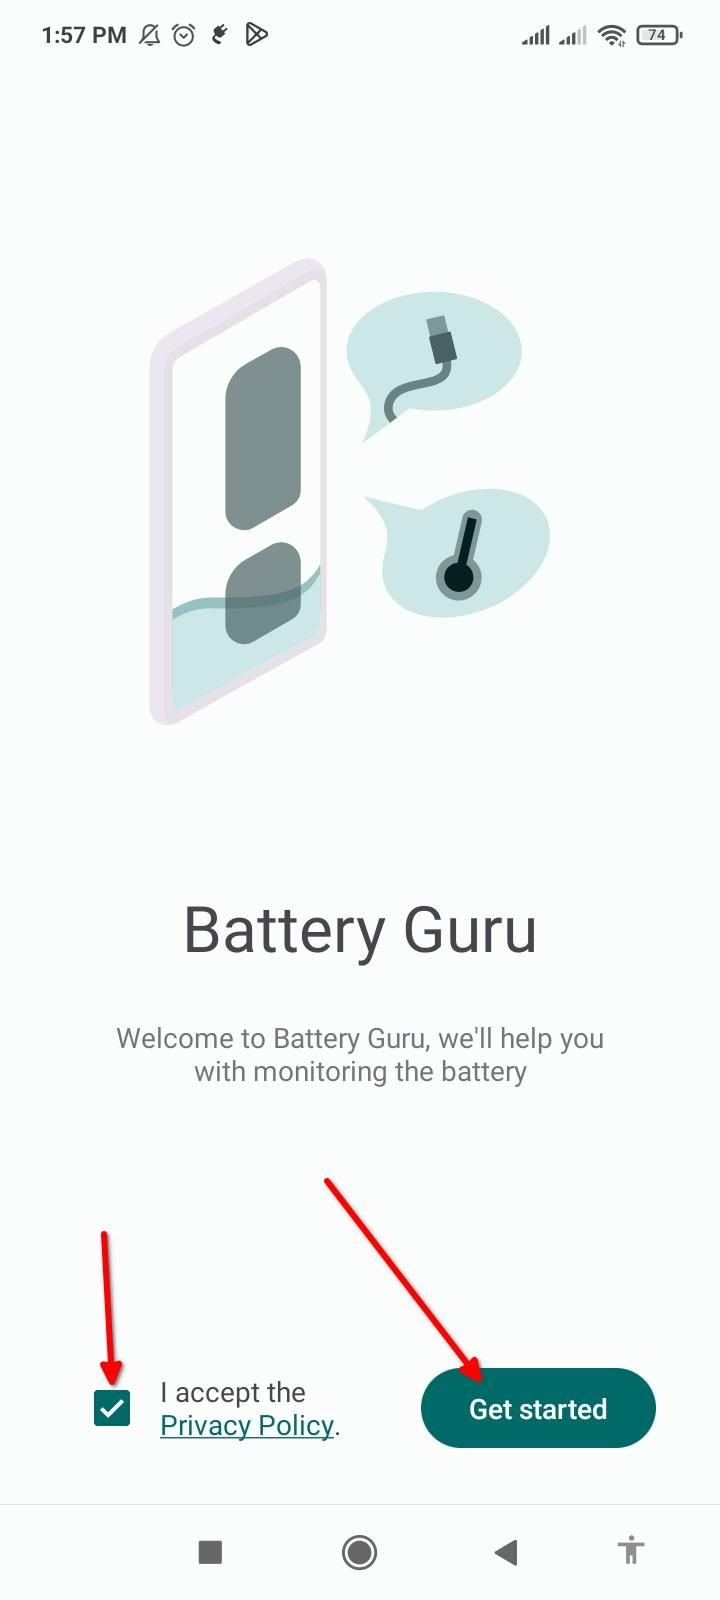
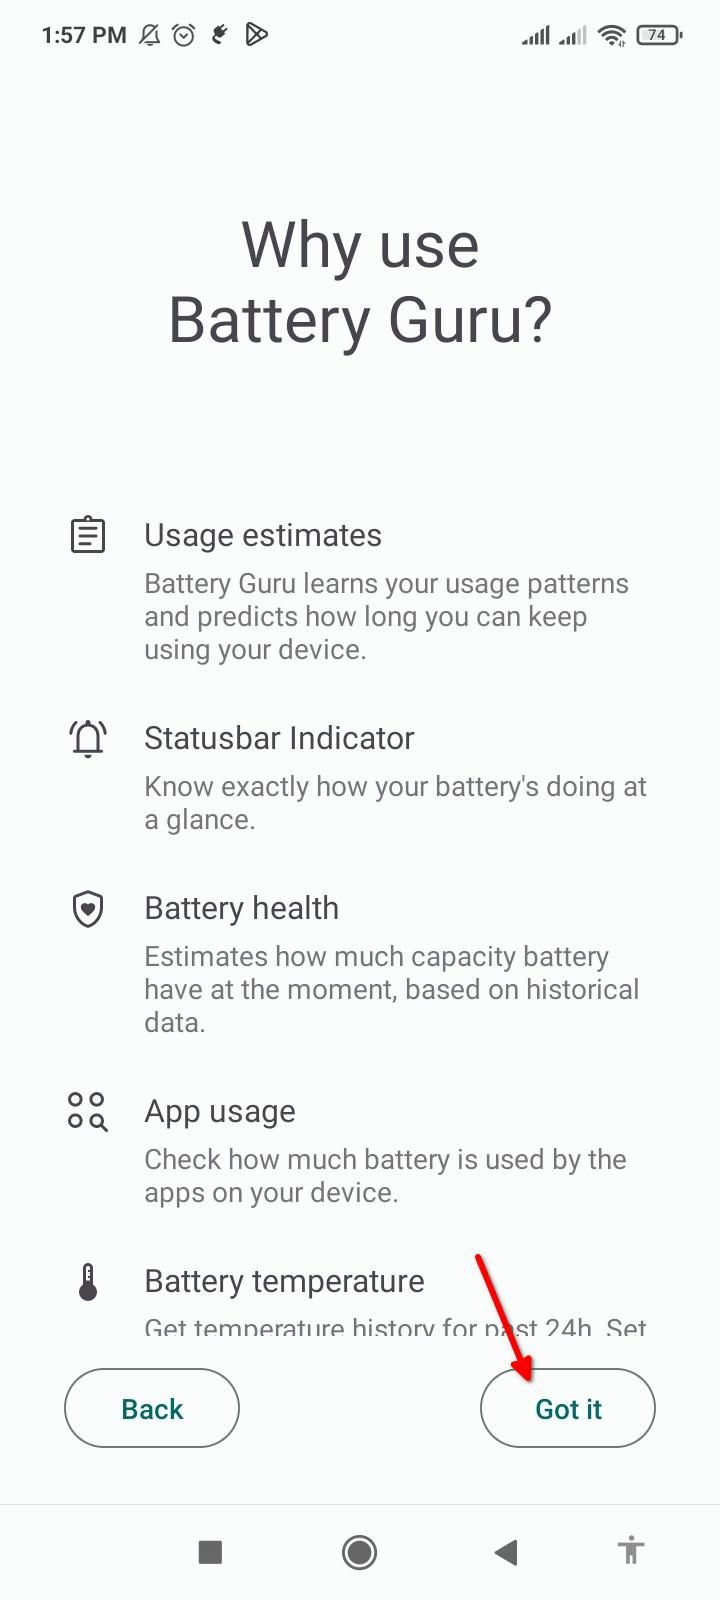
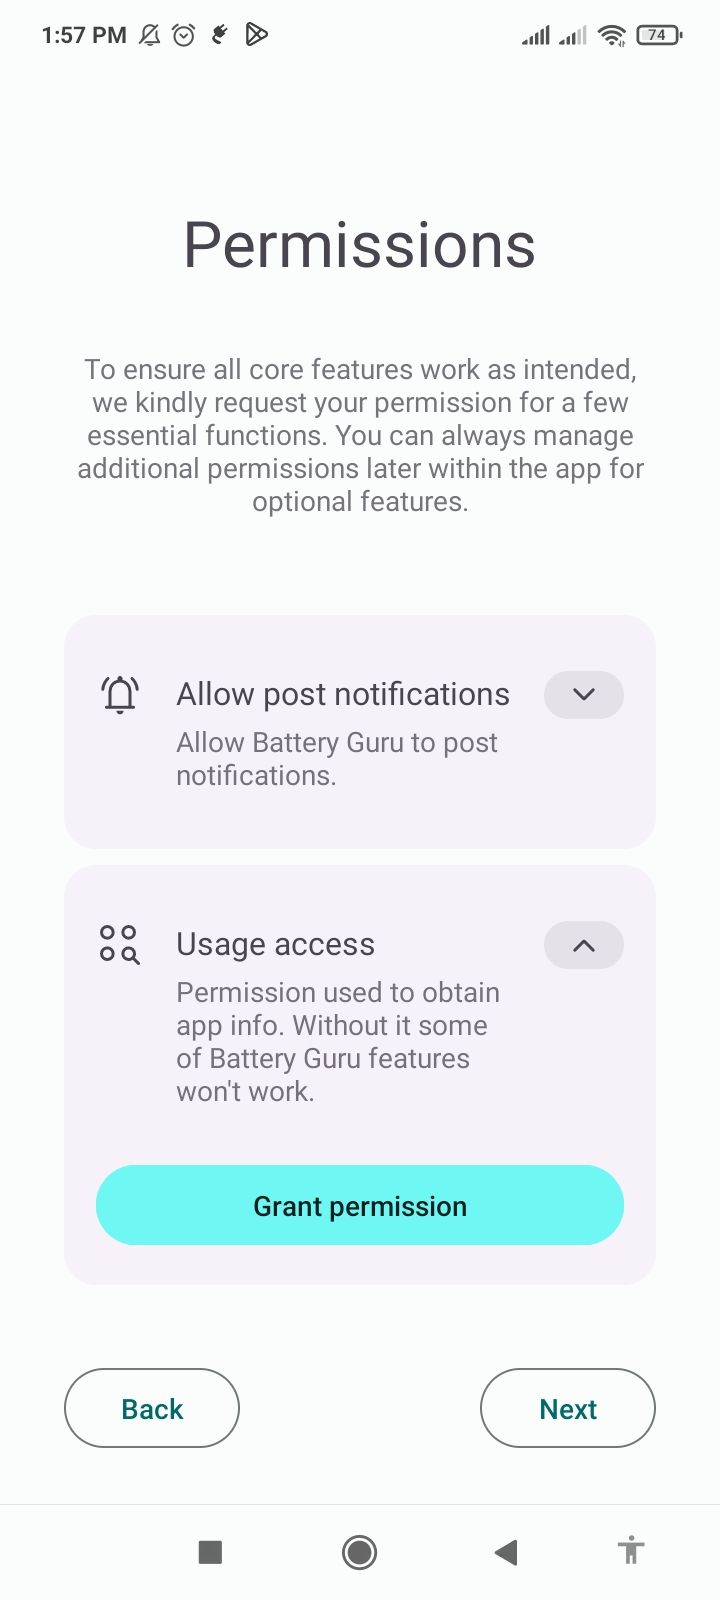
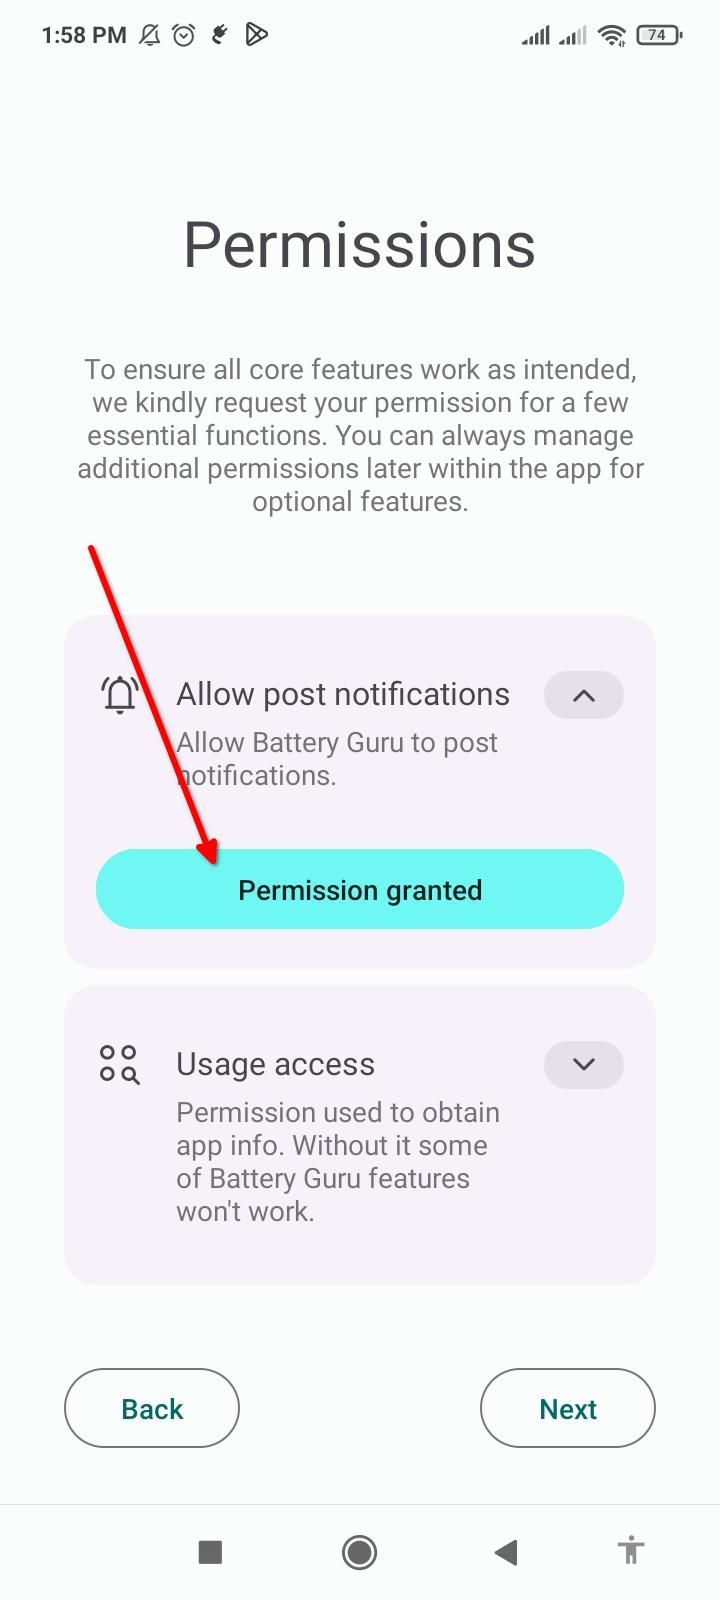
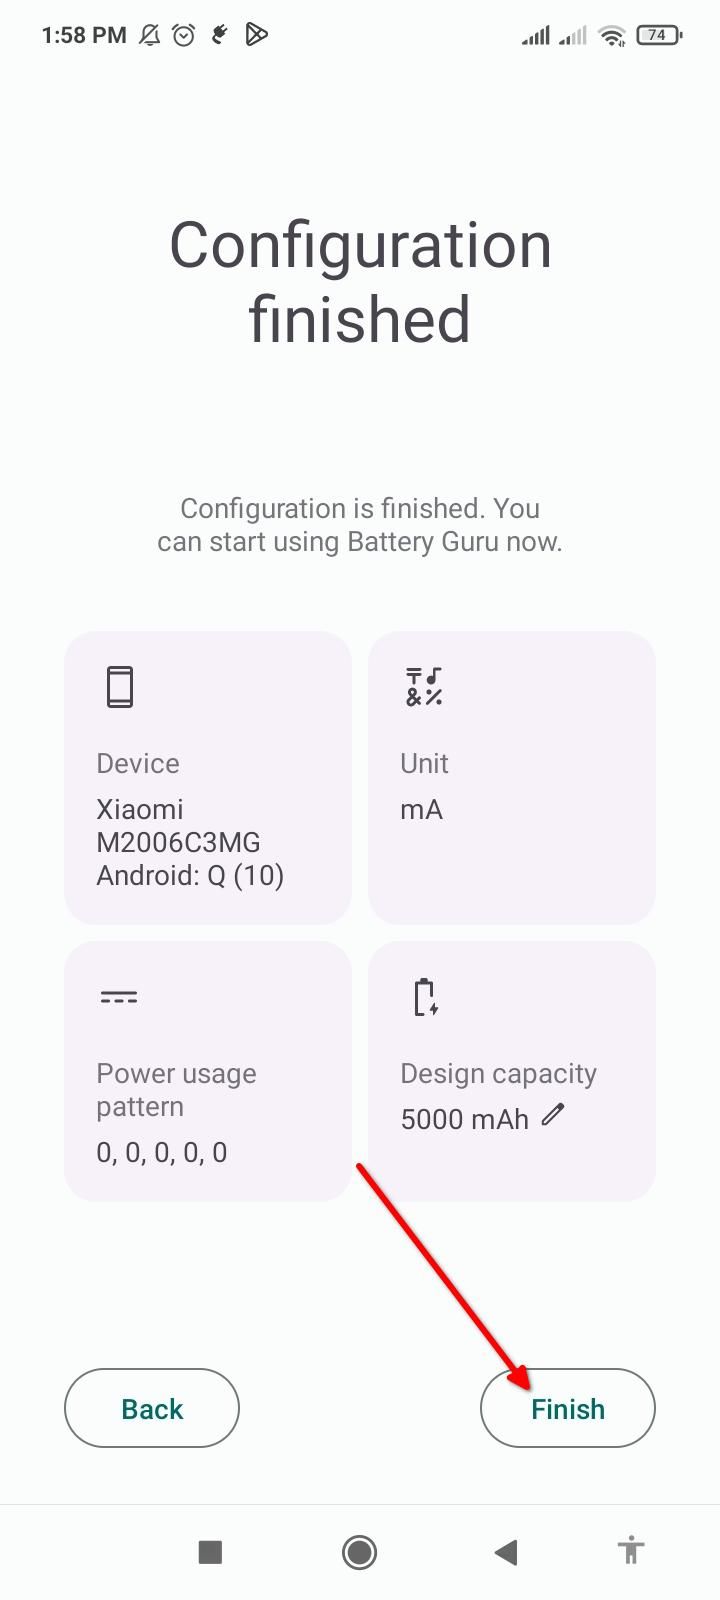
Accept the privacy policy and tap “Get Started.” The next screen shows what the app can do. Tap “Got it.” We also need to grant necessary permissions. Go ahead and allow Battery Guru to send you notifications and read usage info. Tap “Next.” To complete the setup, tap “Configure” and then “Finish.”
Close
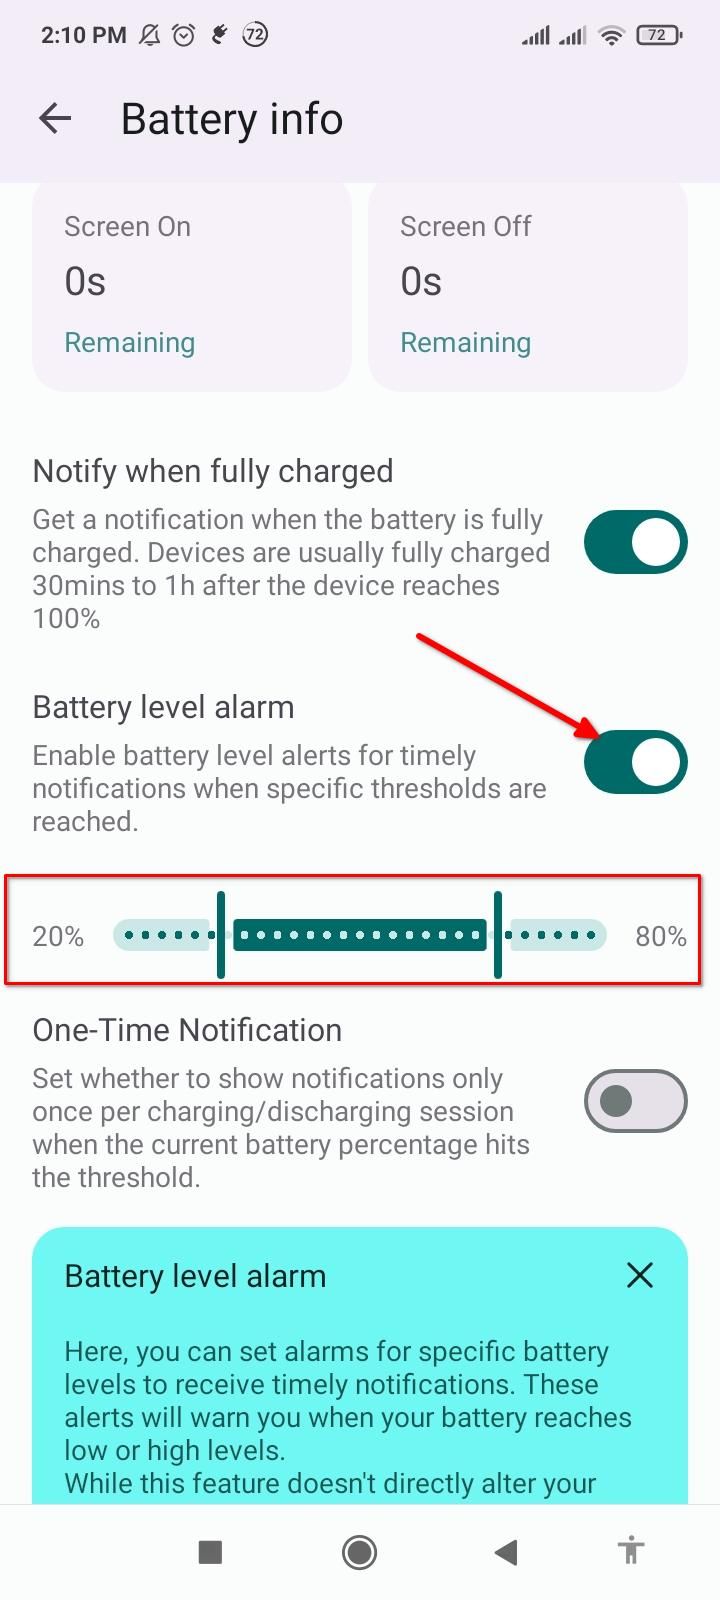
Tap the “Battery Info” tile and scroll down to Battery Level Alarm. Press the toggle to set the alarm and use the slider to pick your battery range. I’ve selected 20% and 80%. Your phone will now ring every time the battery levels go above or below the set limits. The same toggle disables the alarm.
Close
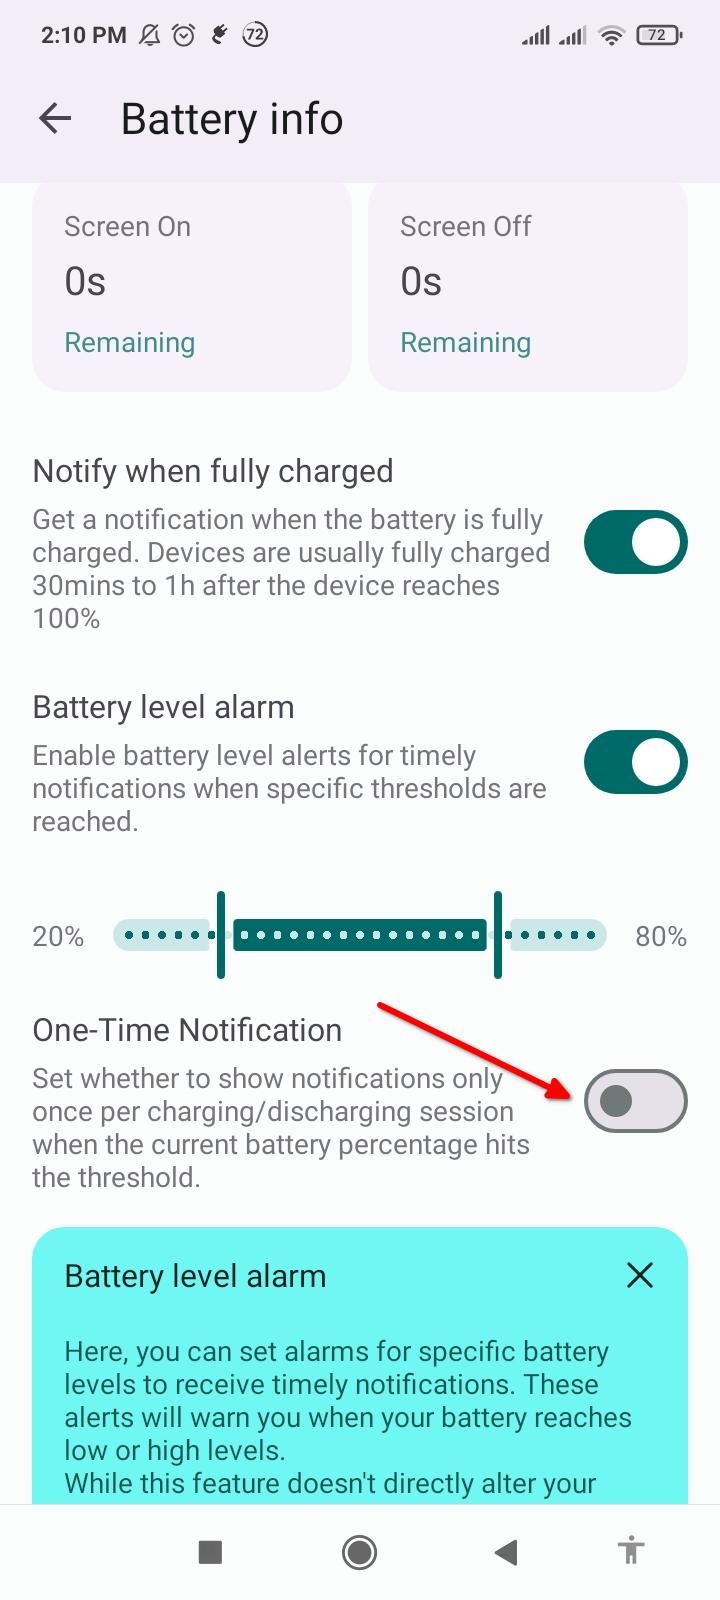
If you want to get a notification alongside (or instead of) the alarm. Toggle the “One-Time Notification” button.
Close
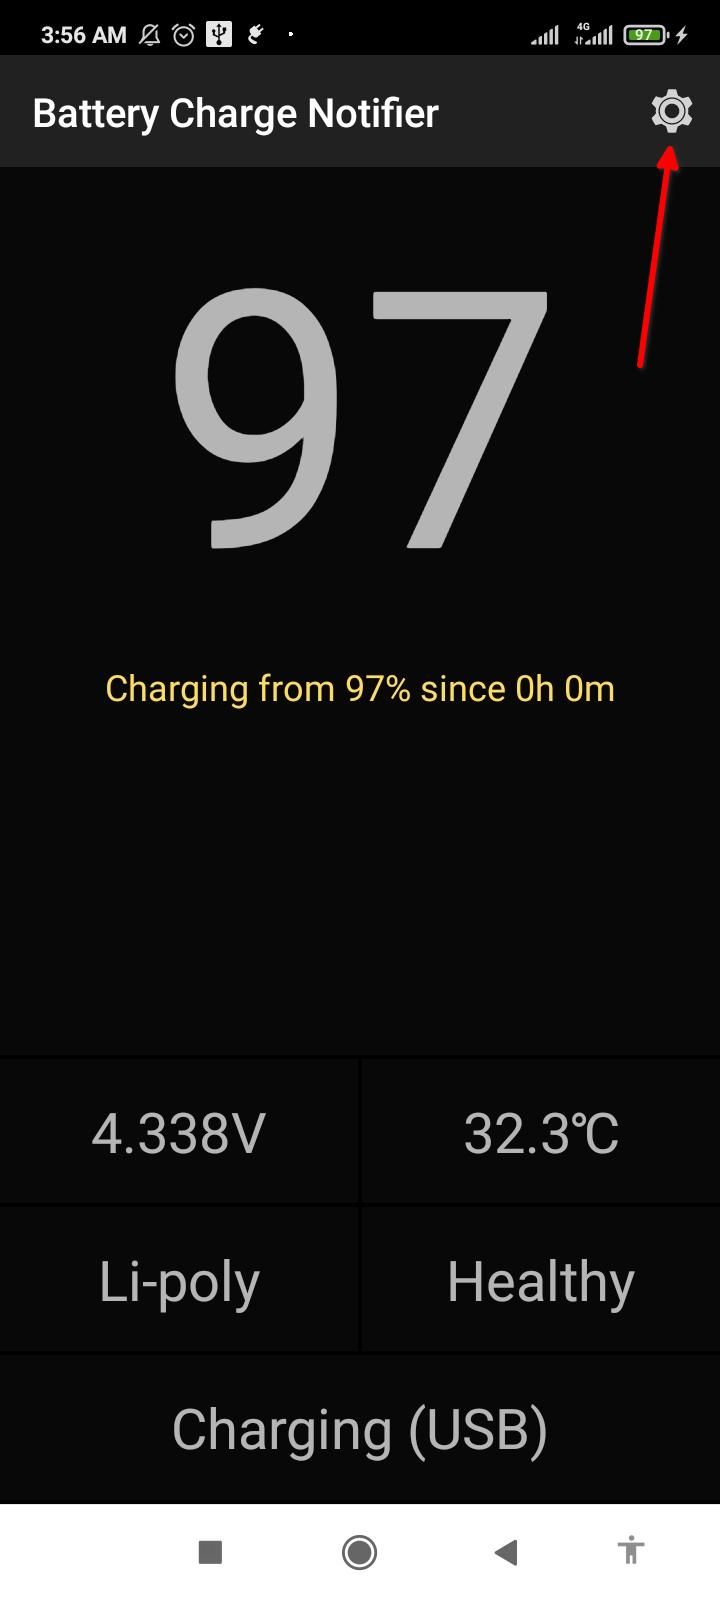
If a full-scale battery management app is too bloated for you, try the Battery Charge Notifier . It’s a simple app that just sends you notification alerts. You can configure it to send one-time or repeating alerts. To set up the Battery Charge Notifier, install it from the Play Store and launch it.
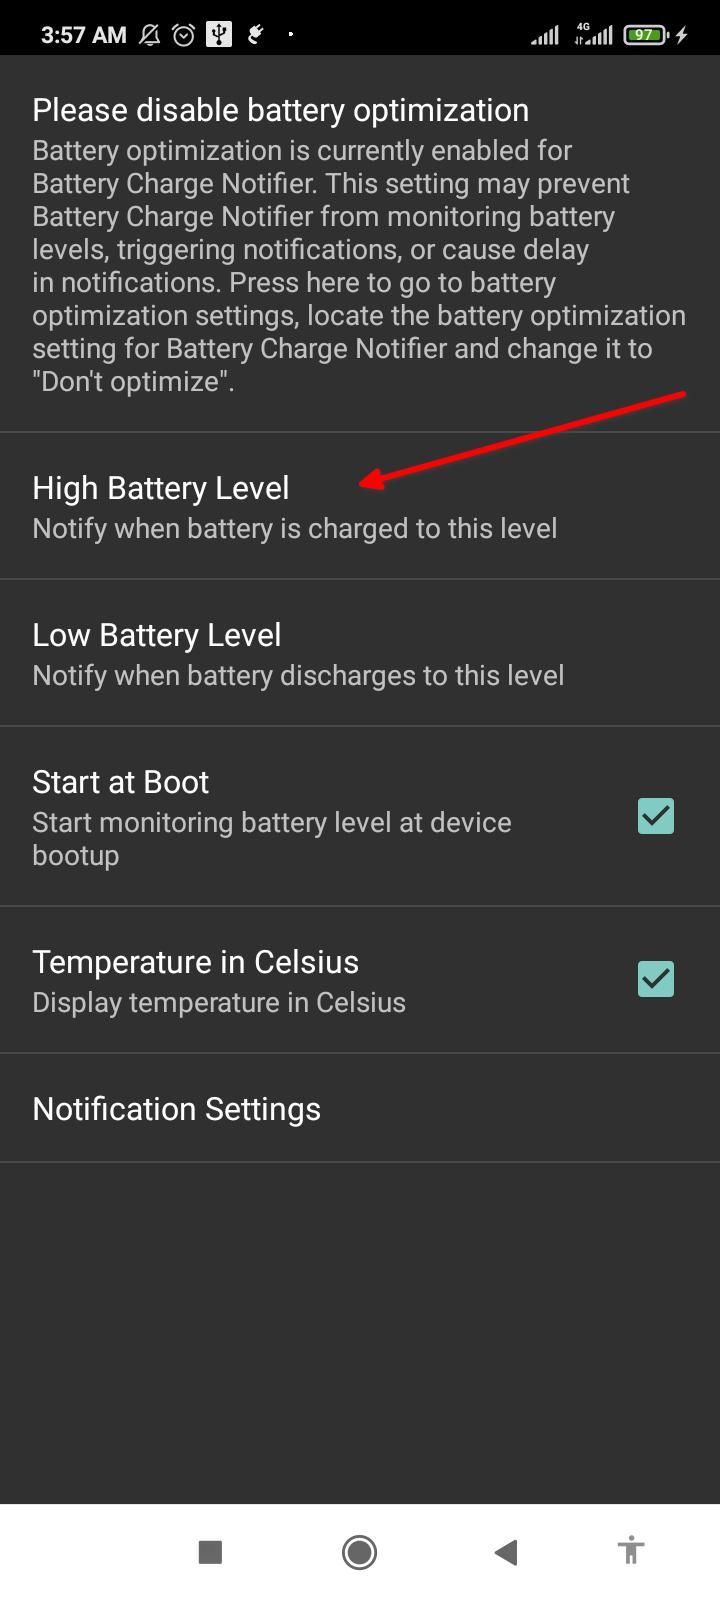
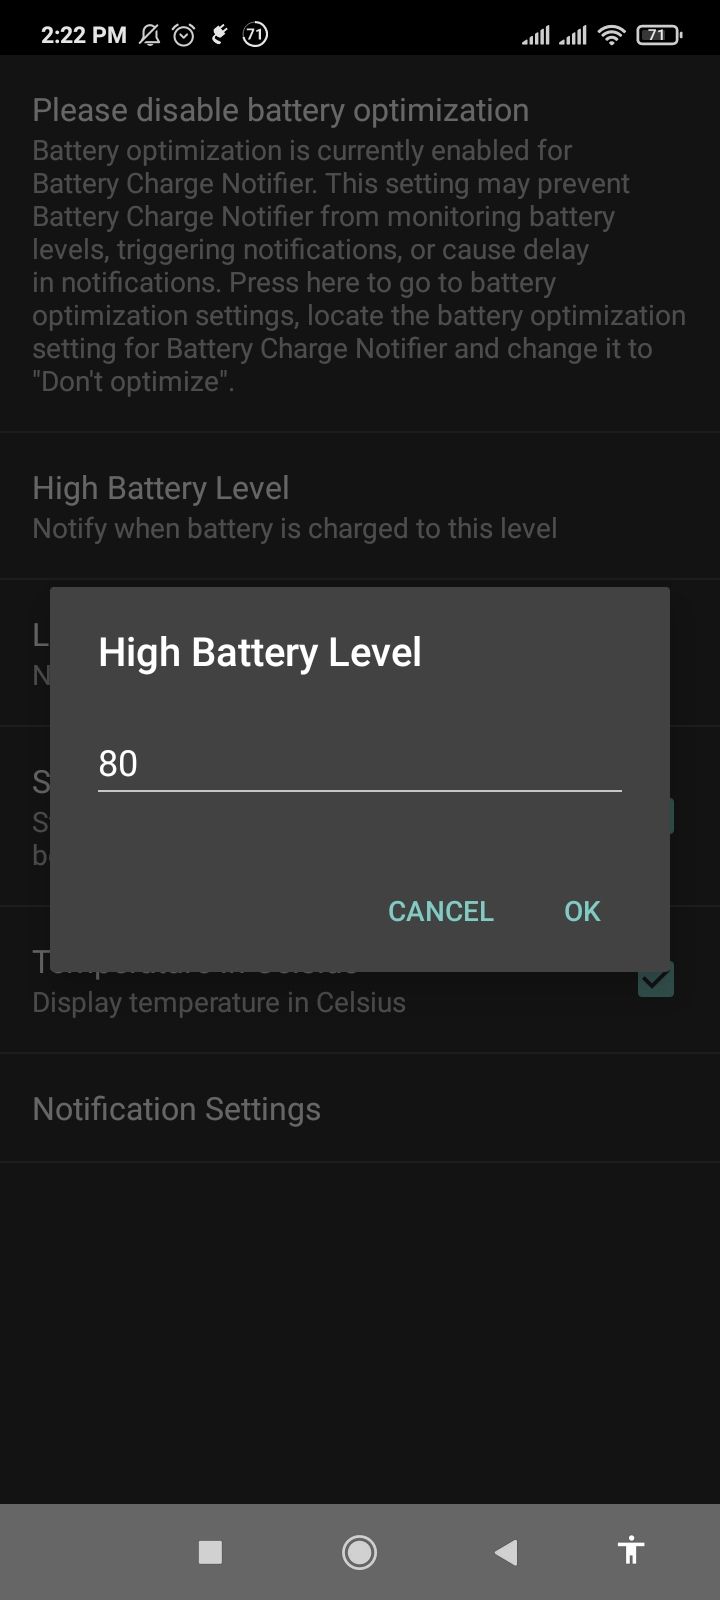
Tap the gear icon to open settings. Tap “High Battery Level,” set a number, and tap “OK.” You’ll get a notification when the phone charges to this level.
Close
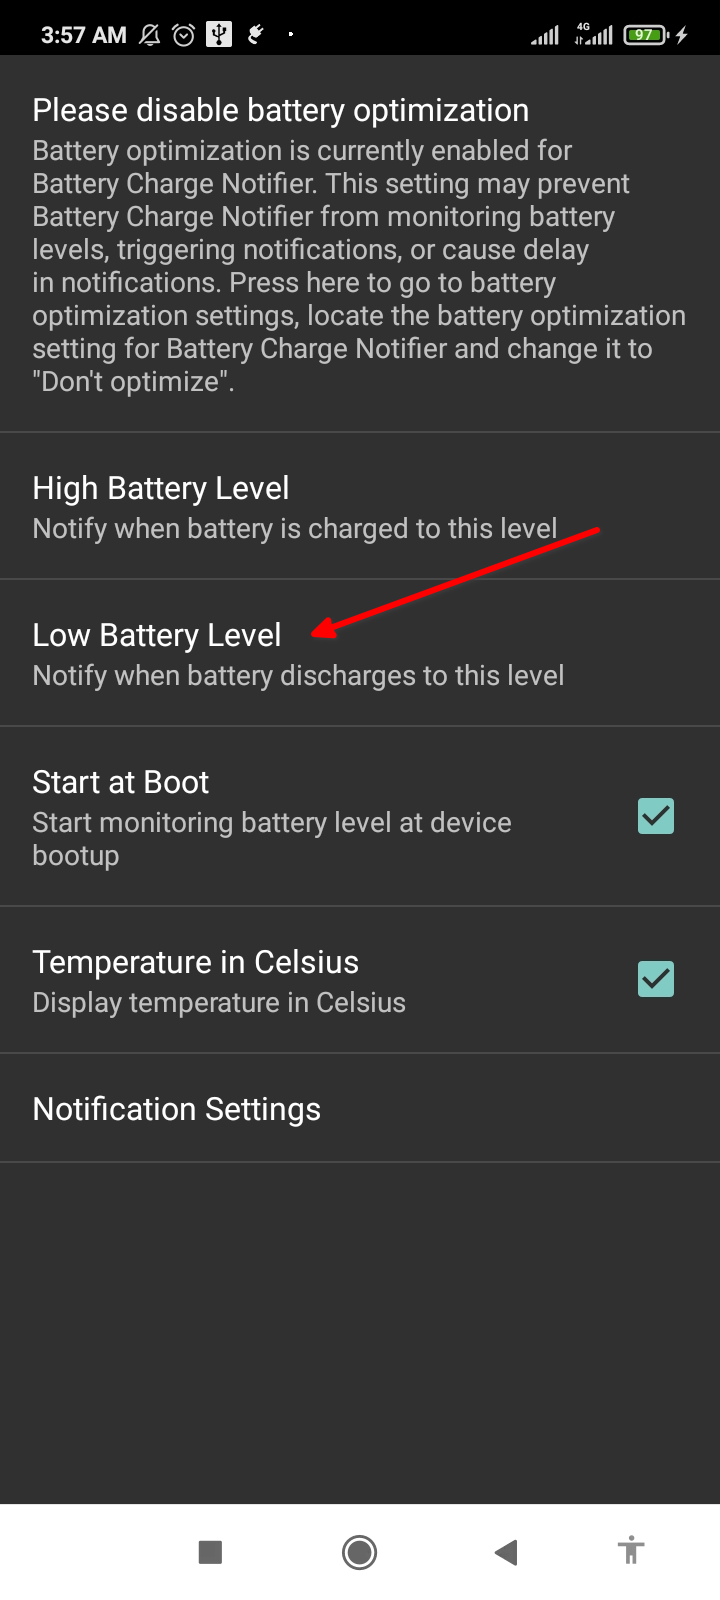
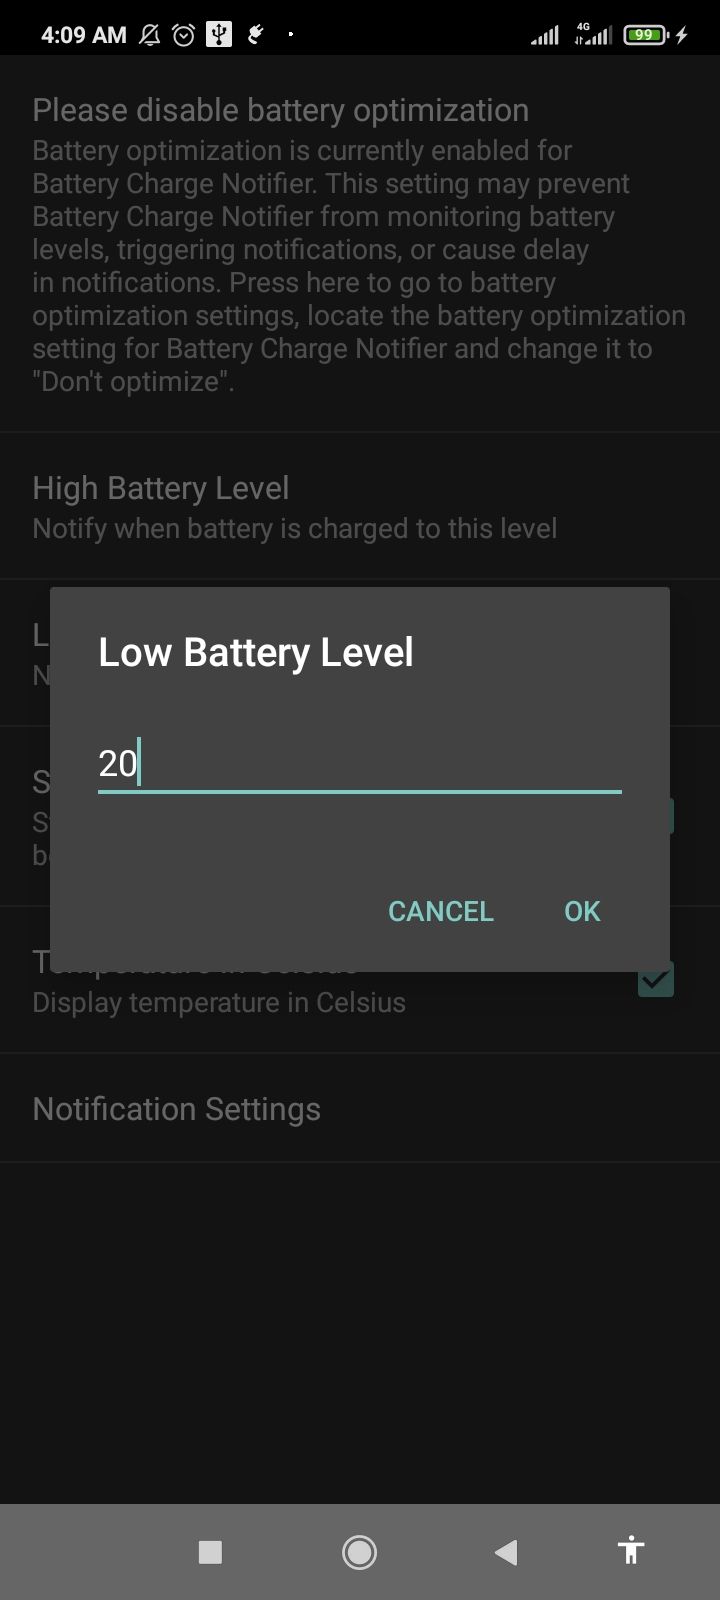
Do the same for Low Battery Level.
Close
Next, tap Notification Settings and scroll down to Repeat Notifications. Here you can configure the app to send out repeat alerts. Tap the toggle next to Charging to enable it. And choose a “Repeat Period.” I picked 5 minutes, which means I’ll get a notification to unplug my phone every 5 minutes after it hits 80%.
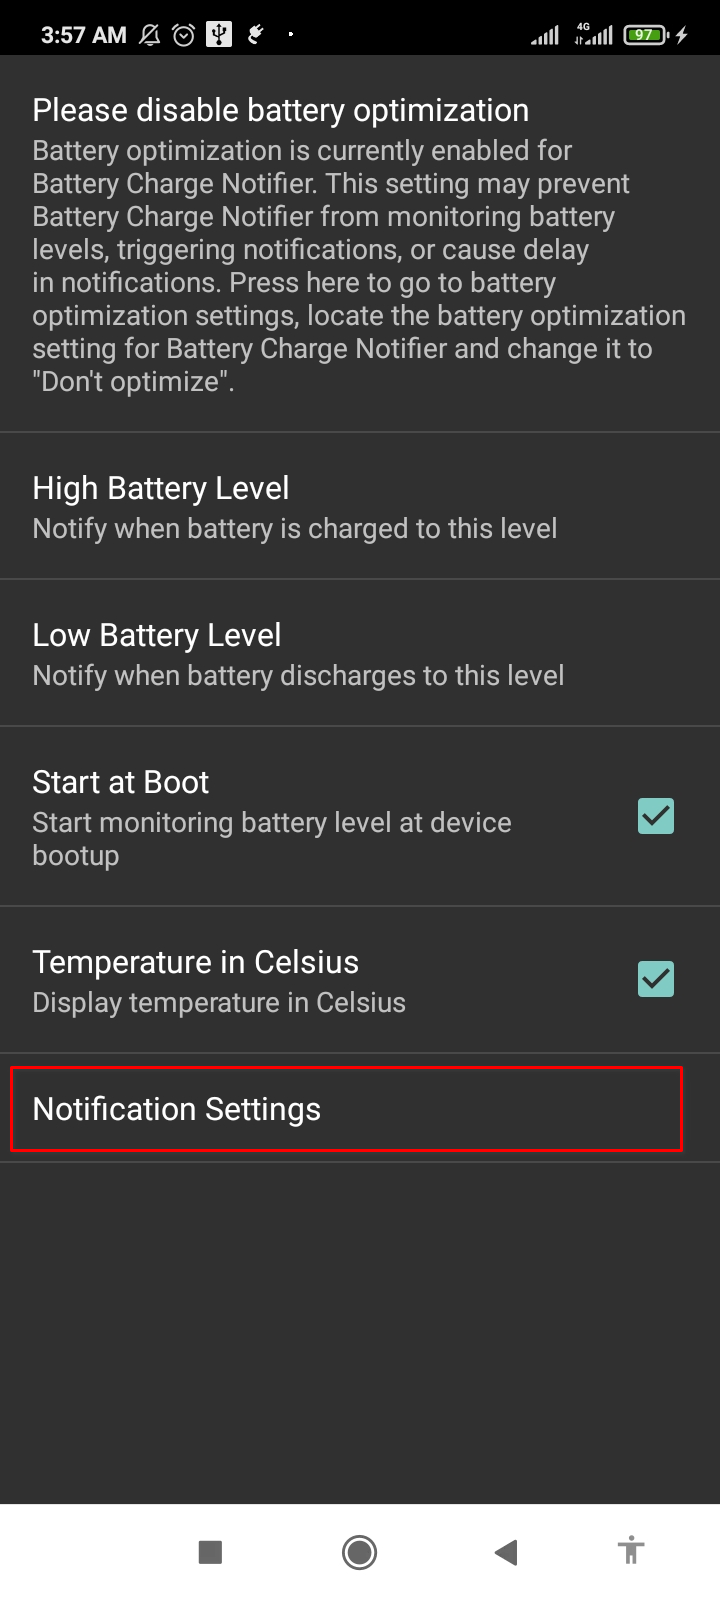
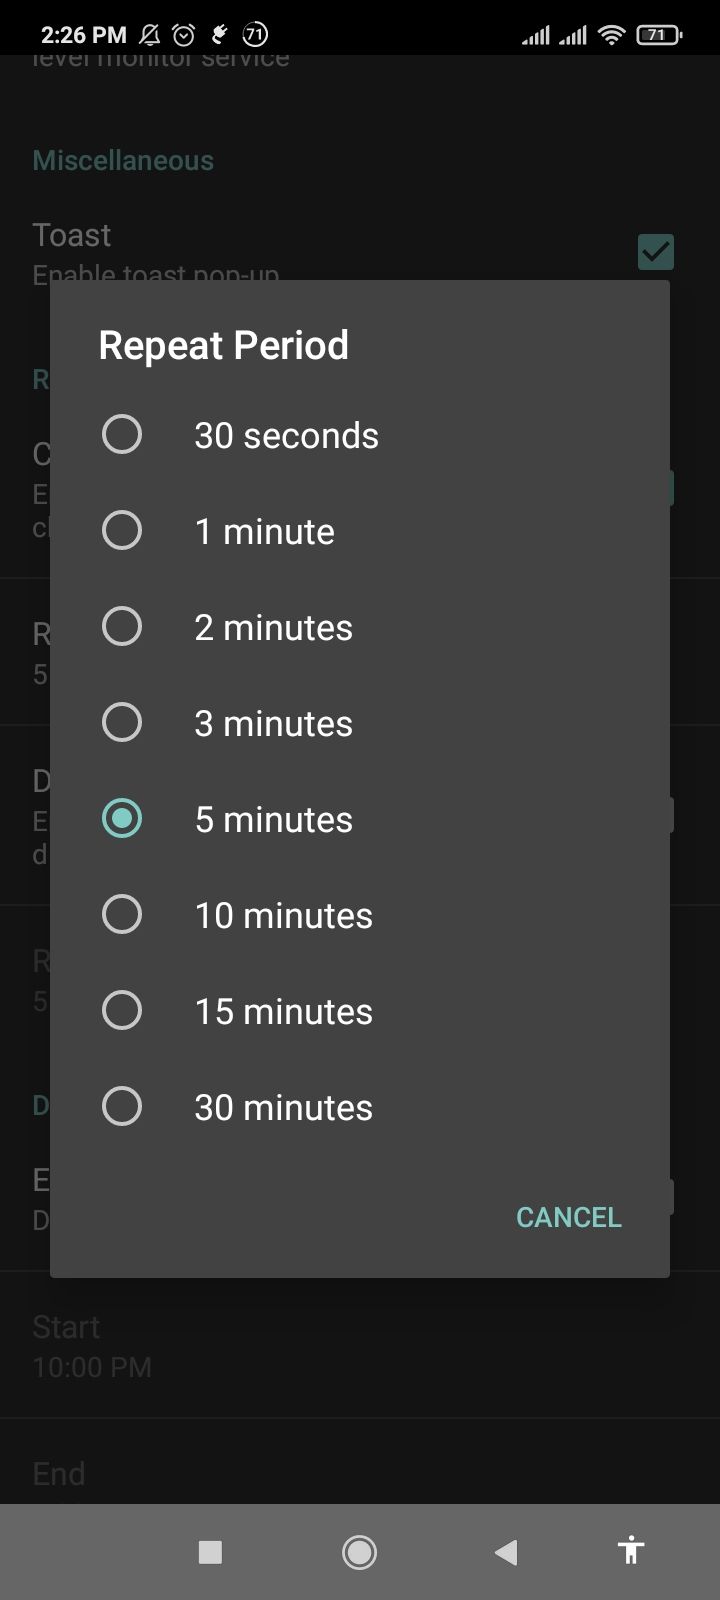
Close
Repeat the same steps for Discharging to get multiple notifications when the battery level drops below 20%.
How to Create Custom Charging Alerts Manually
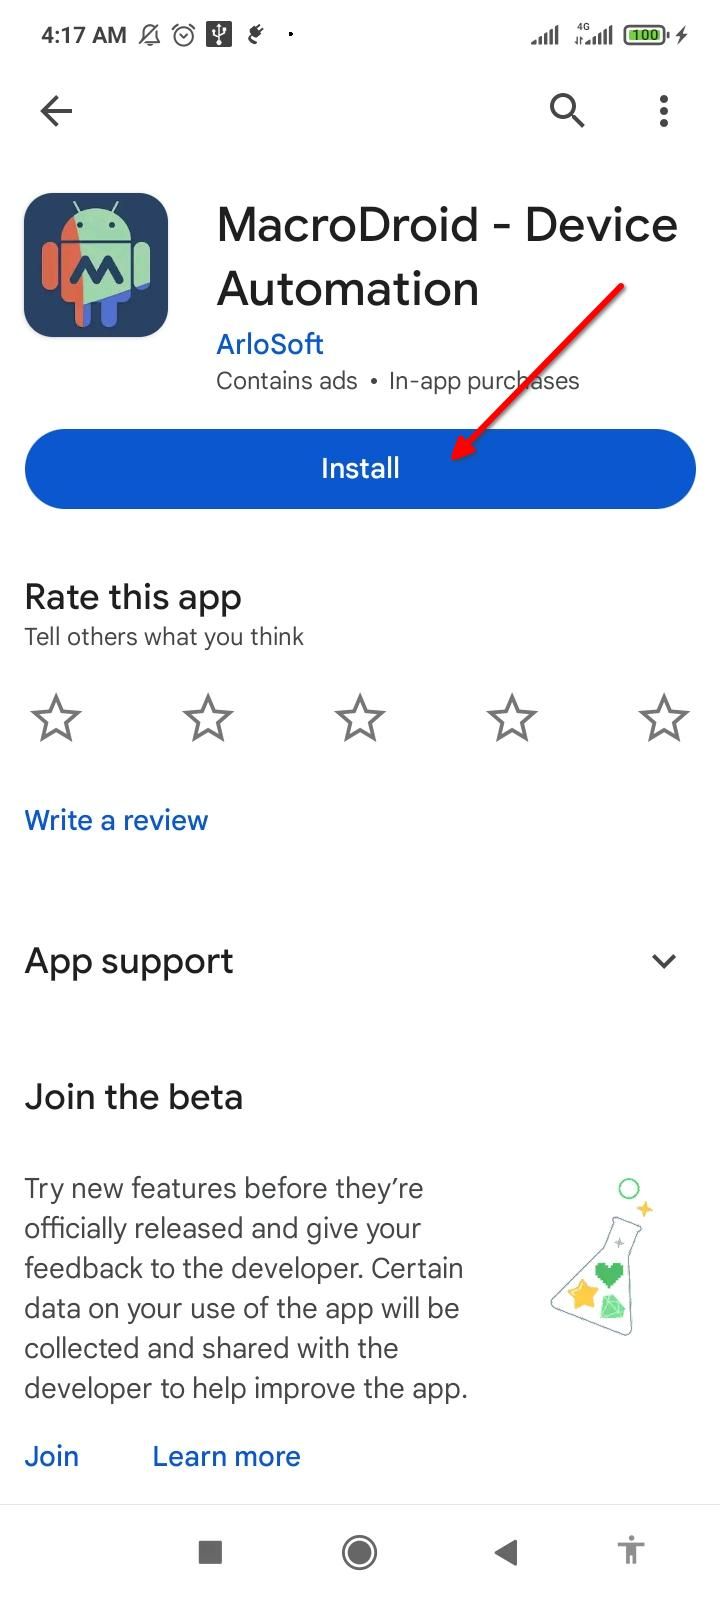
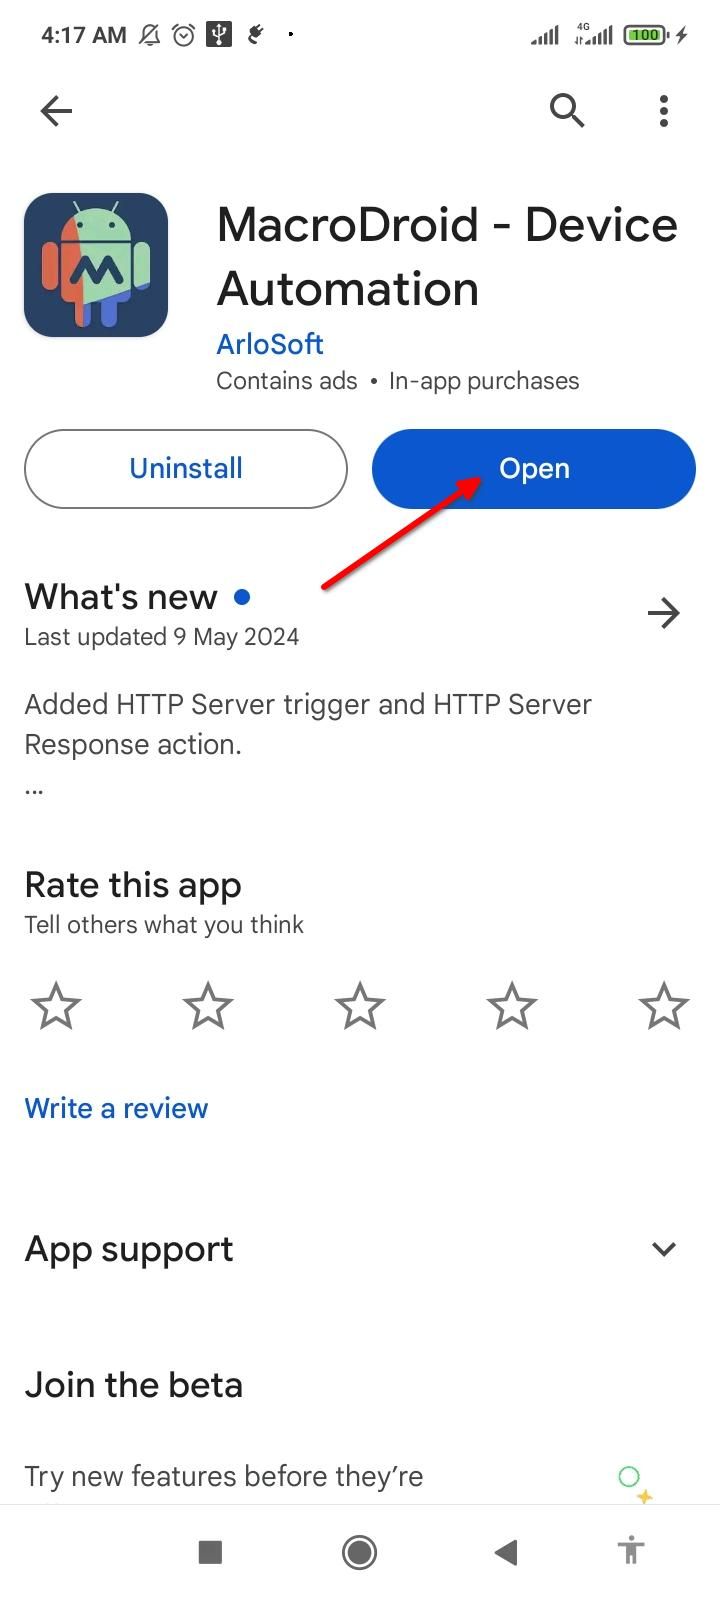
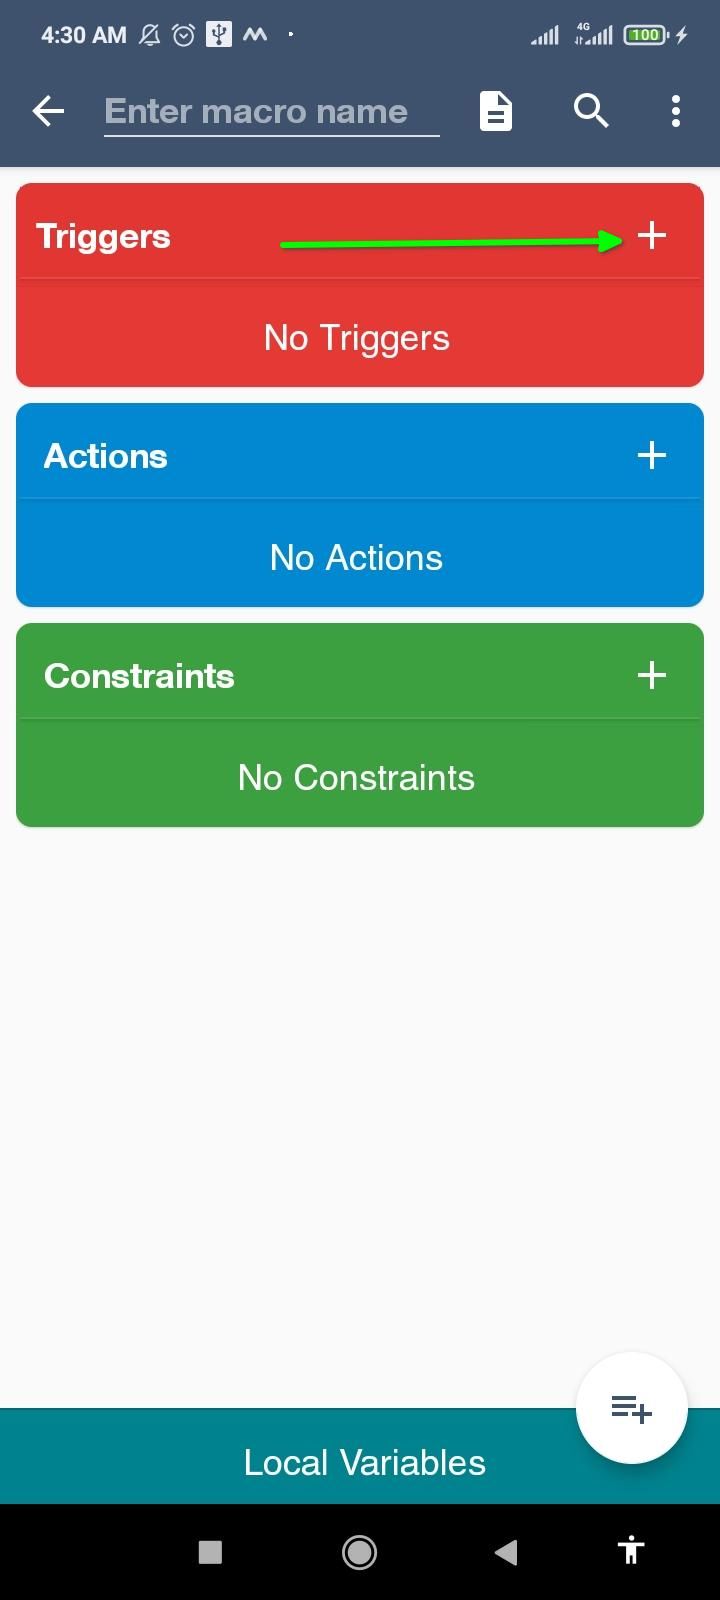
There’s a manual way to create battery alerts too. It’s a little more involved but it gives you the most control. We’ll use MacroDroid for this job. It’s an automation tool that lets you create routines with ease.
When you open the app, it’ll walk you through its features. Simply tap the right arrow button until it drops you on the MacroDroid home.
Close
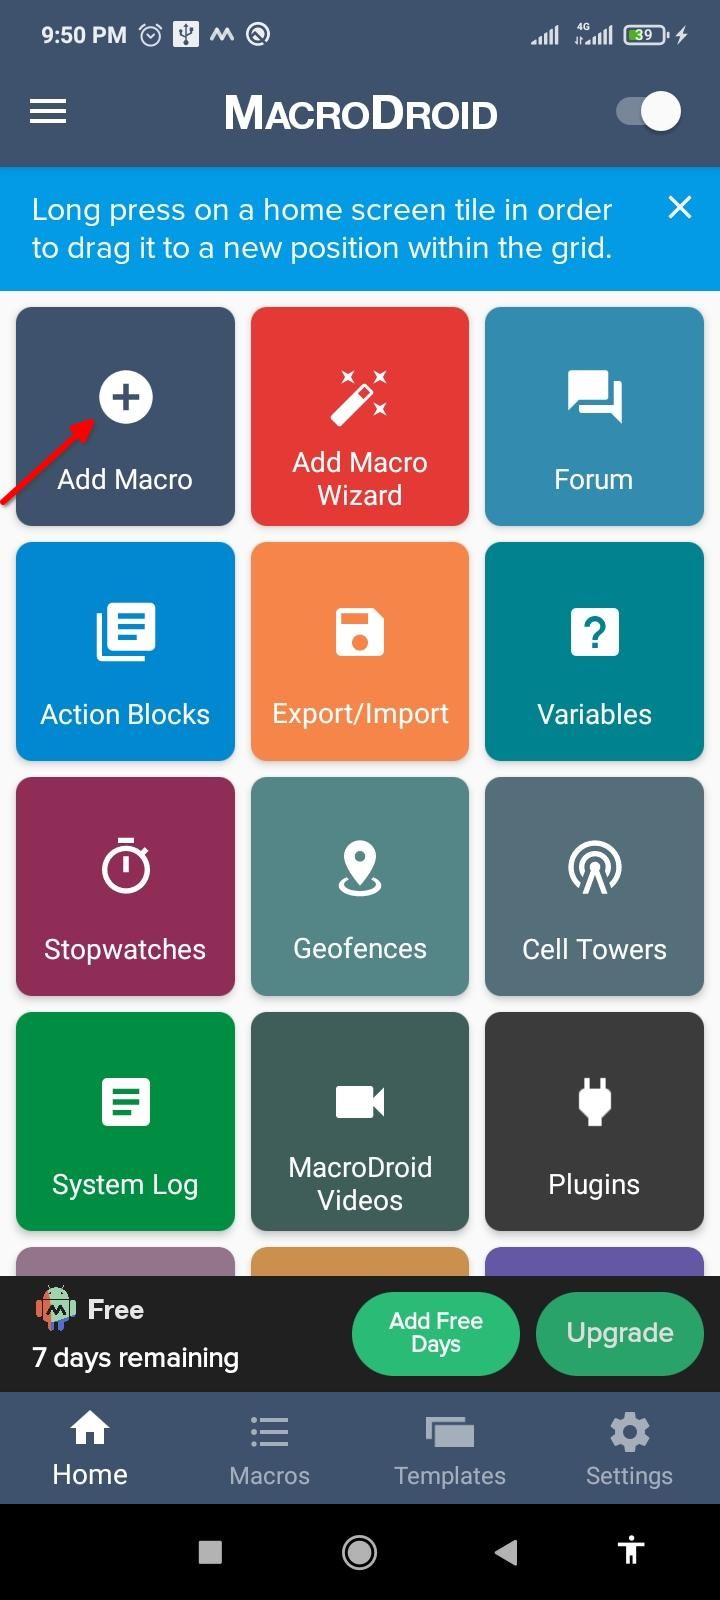
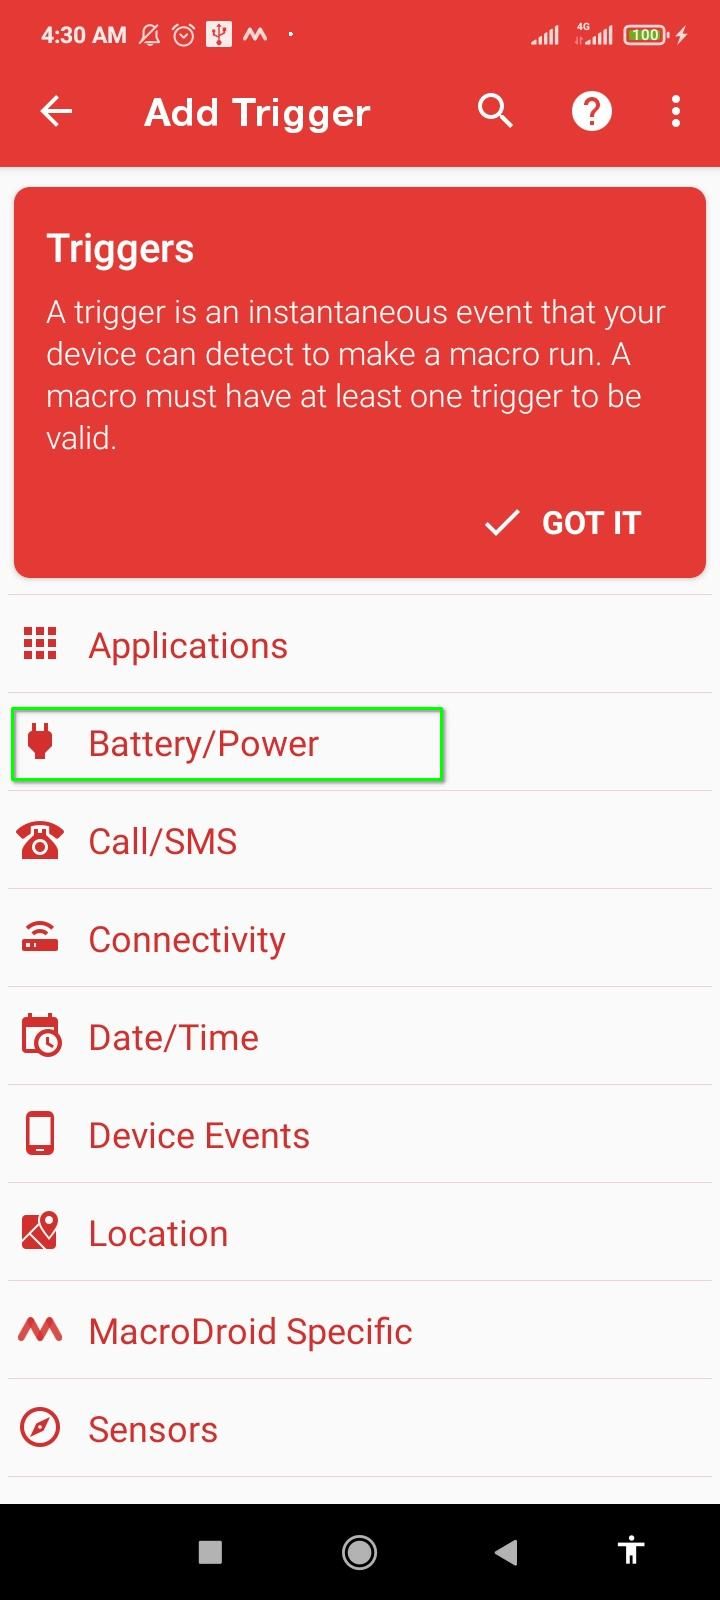
The MacroDroid home is packed with a ton of buttons, but you only need to use the “Add Macro” tile. Select it, then tap the plus icon next to Triggers. Select “Battery/Power” to expand it.
Close
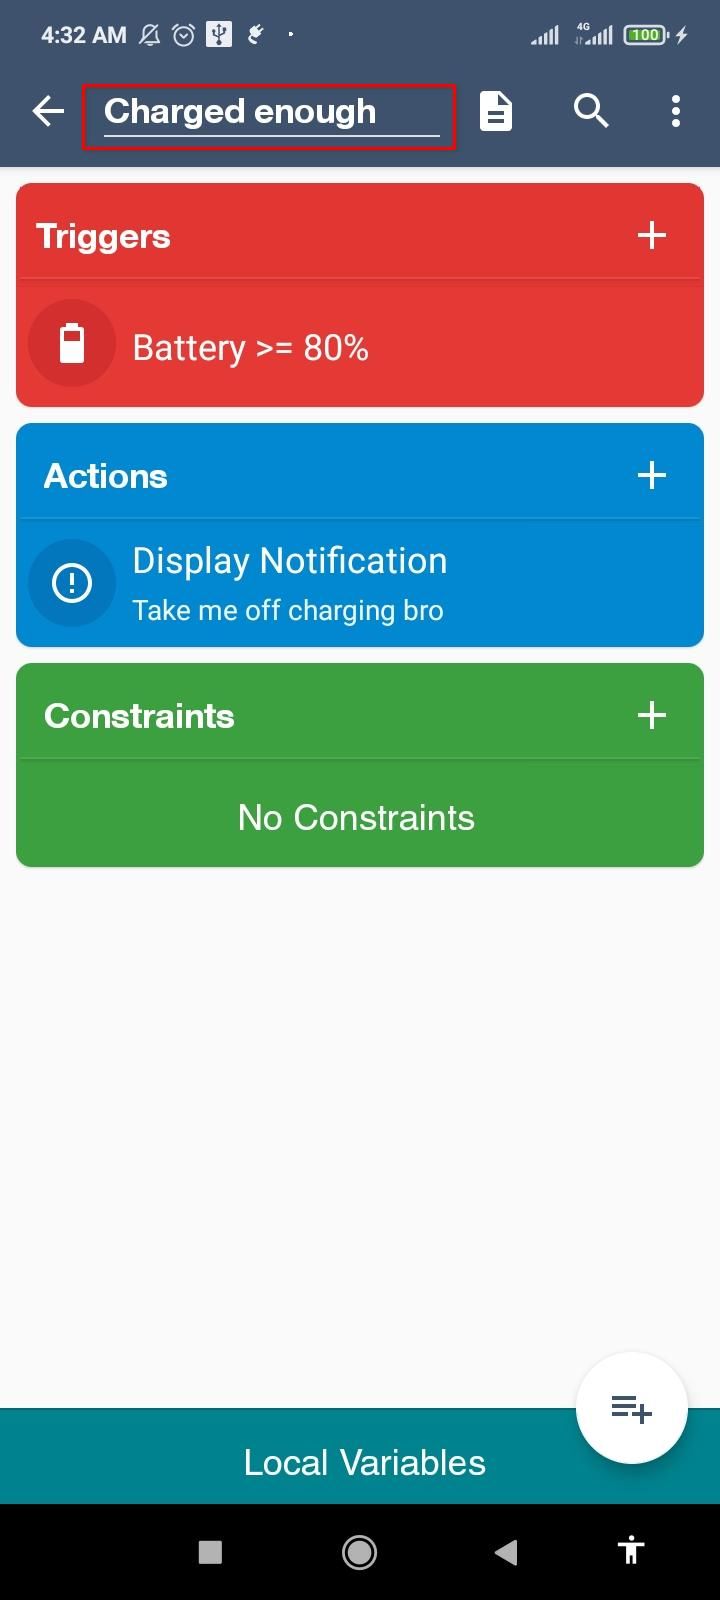
We want the battery level to trigger the alert, so let’s select its tile. Here, we’ll choose “Increase/Decrease” and tap “OK.” Pick “Increases to” and drag the slider to 80%. This set the upper limit, which now appears under Triggers.
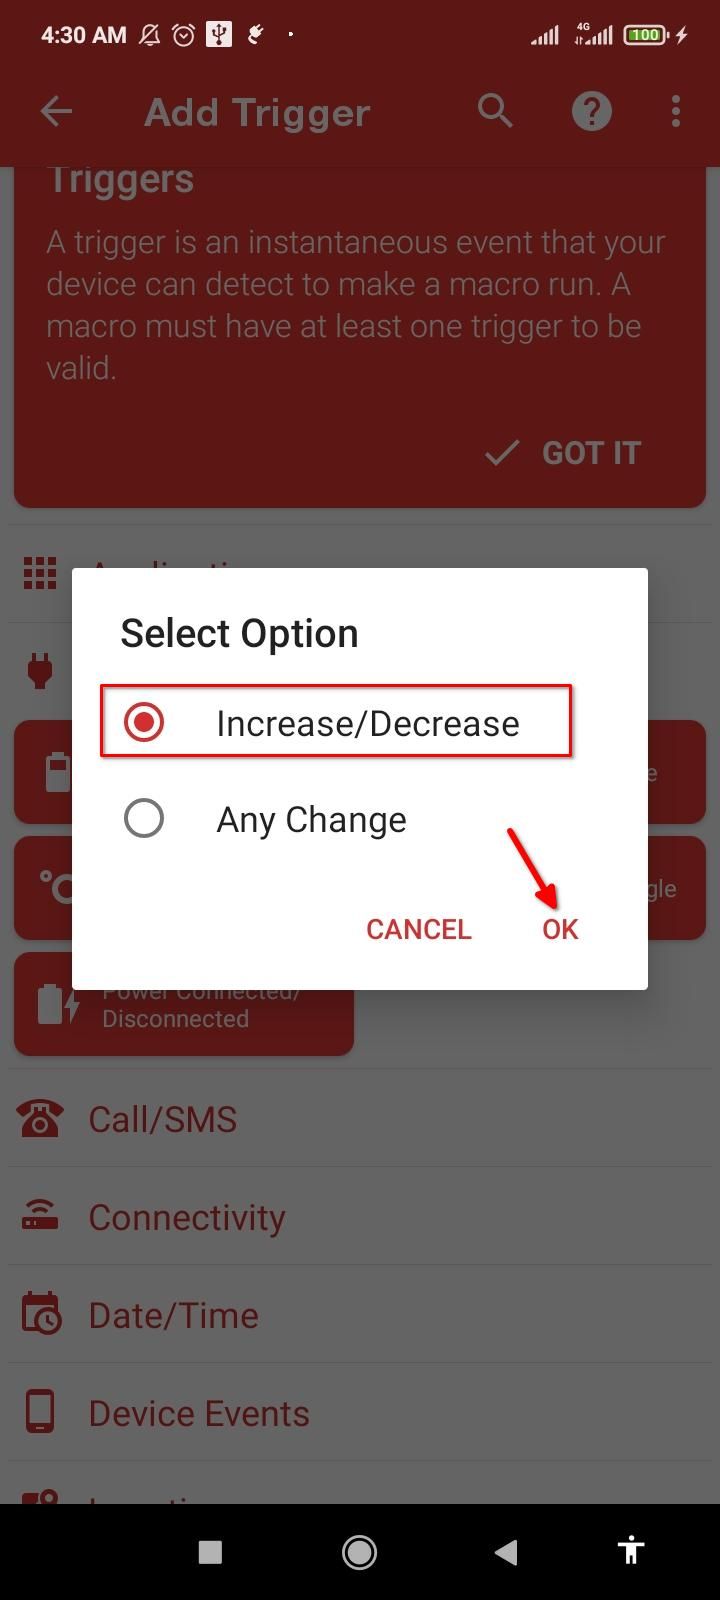
Close
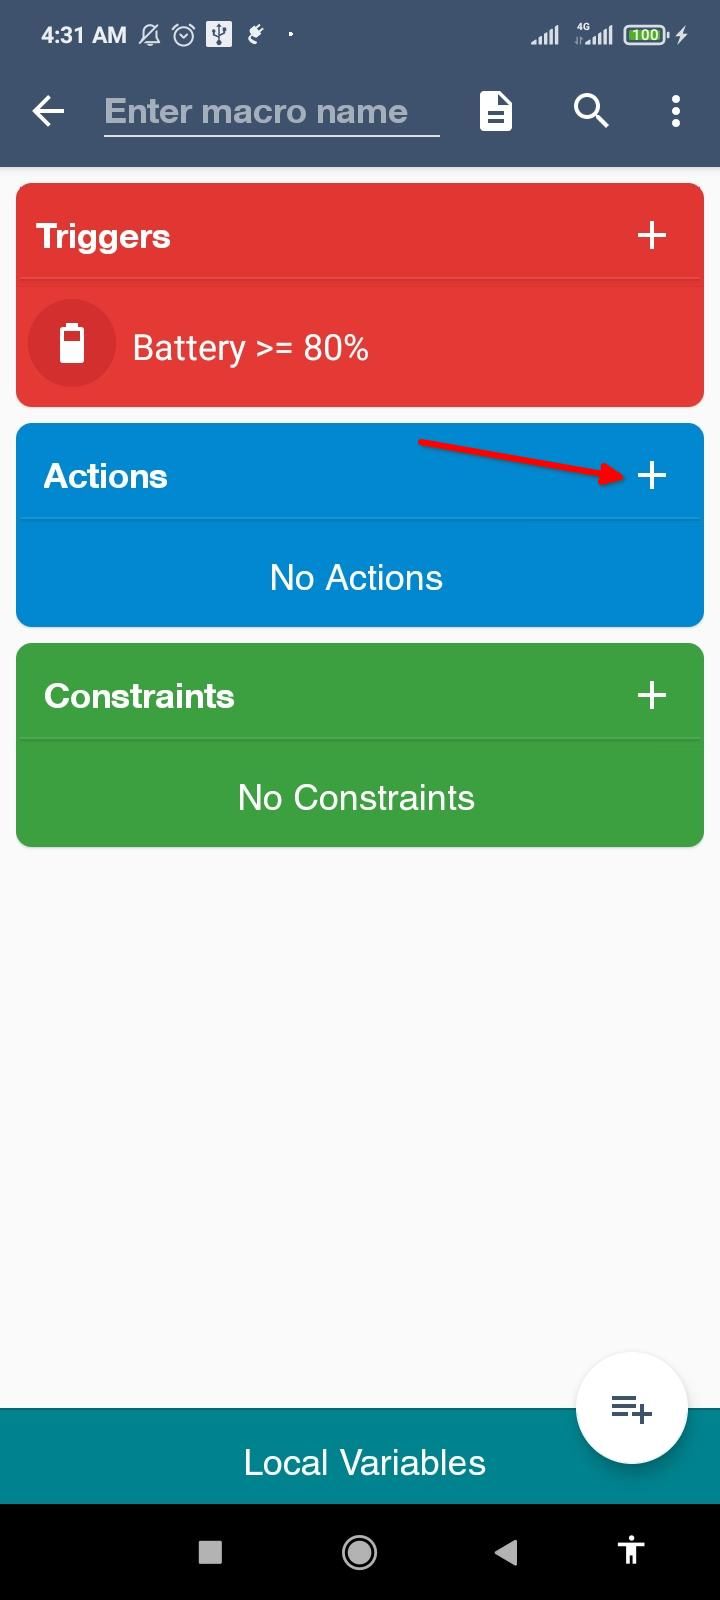
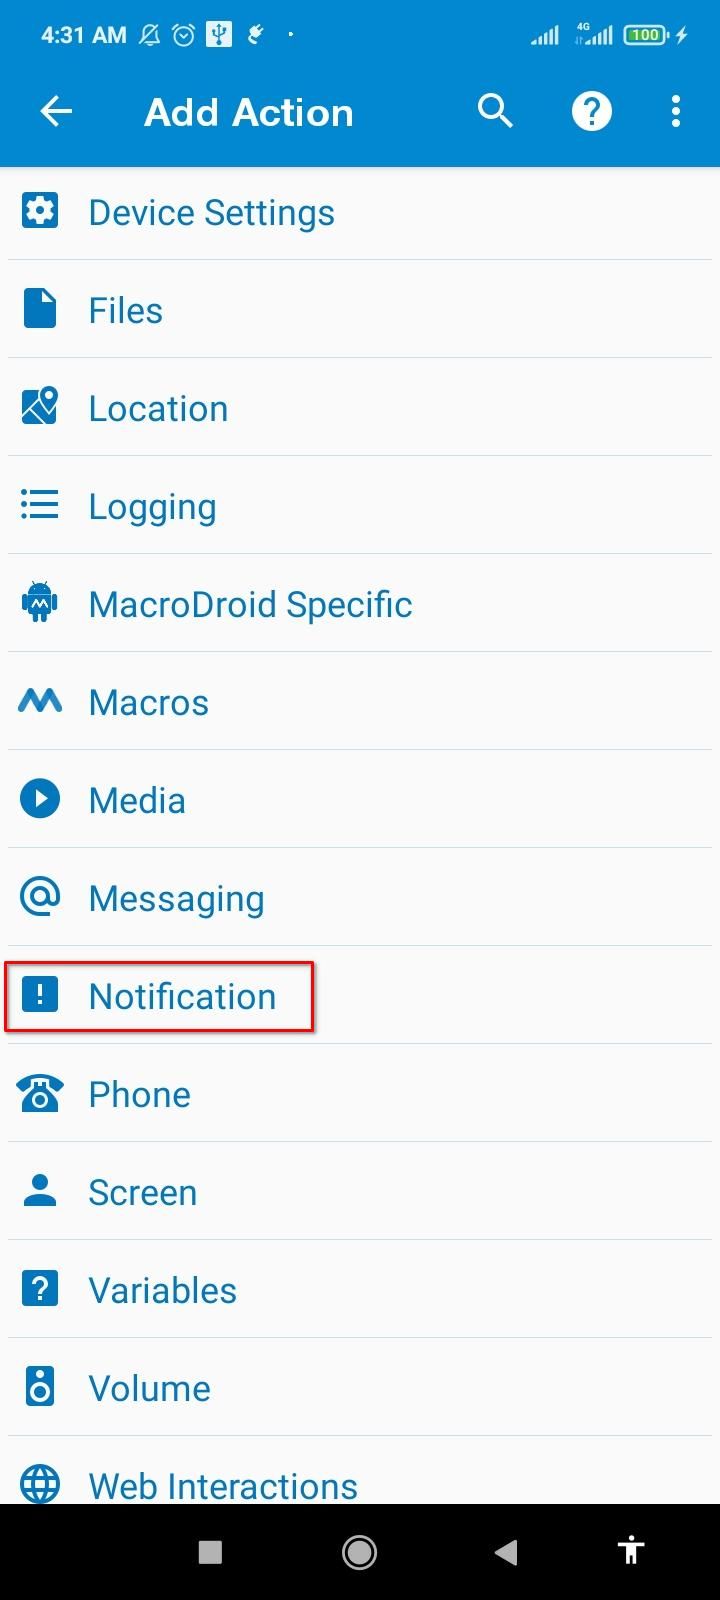
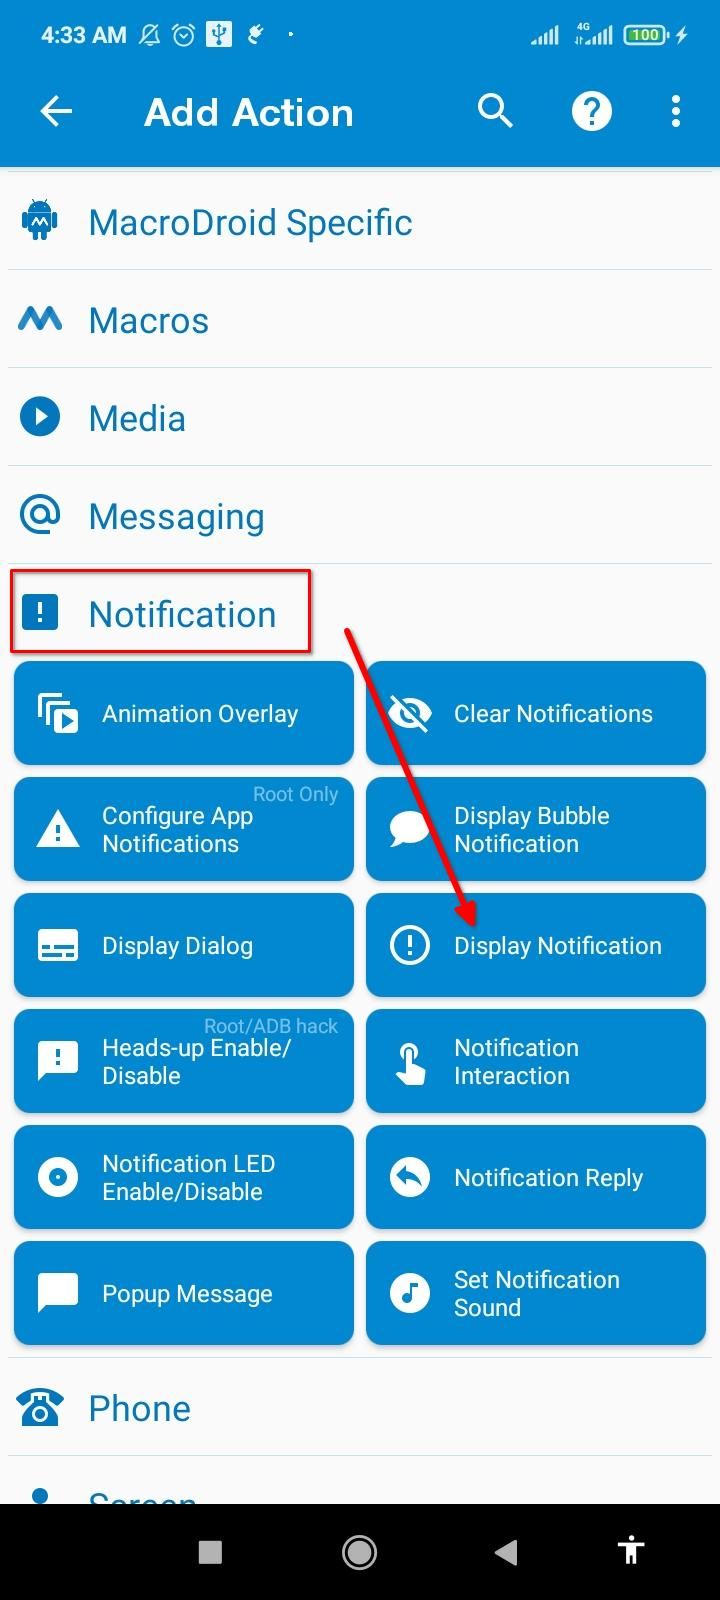
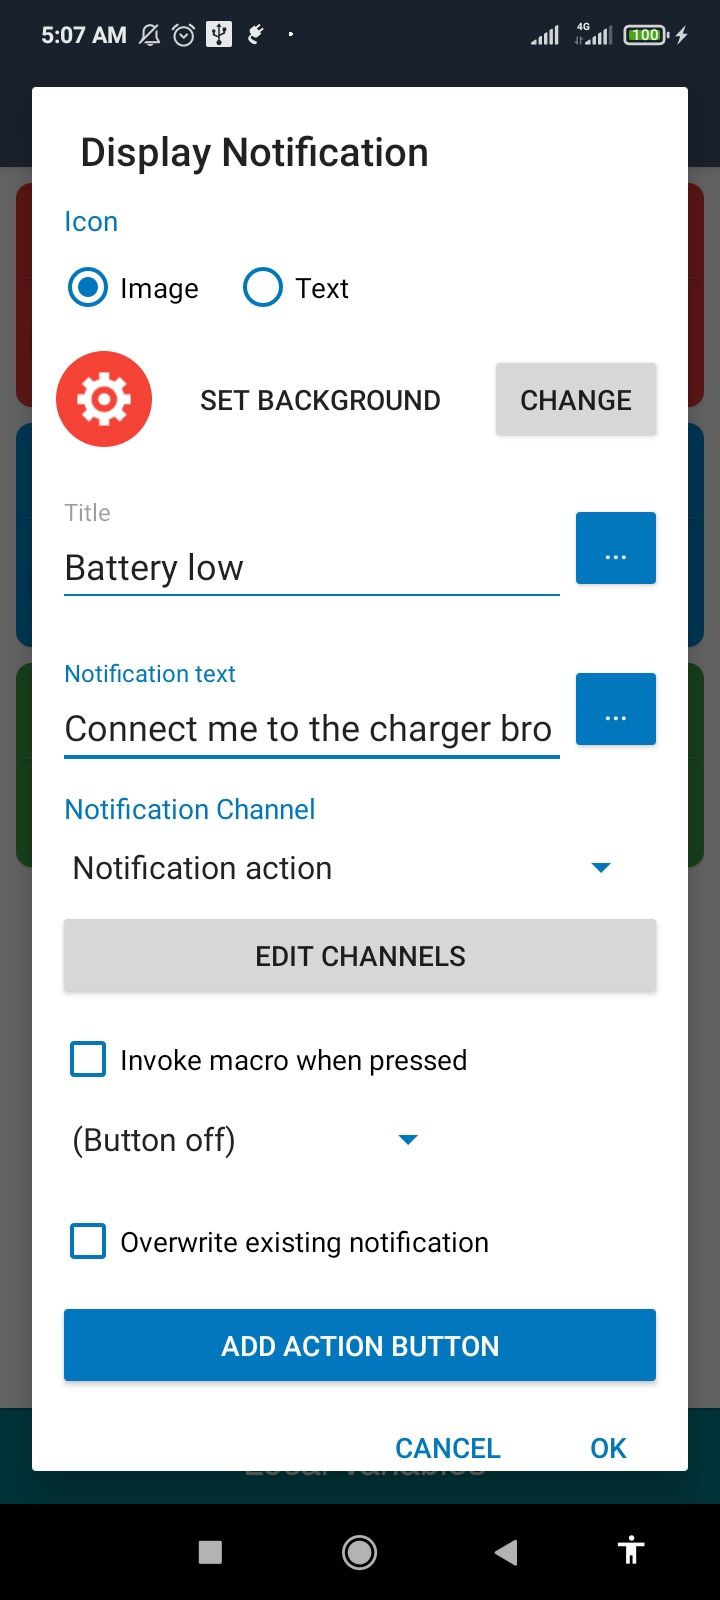
Now tap the plus icon next to Actions. Scroll through the list and tap “Notification.” Select “Display Notification” and type the notification details. Tap “OK” when done.
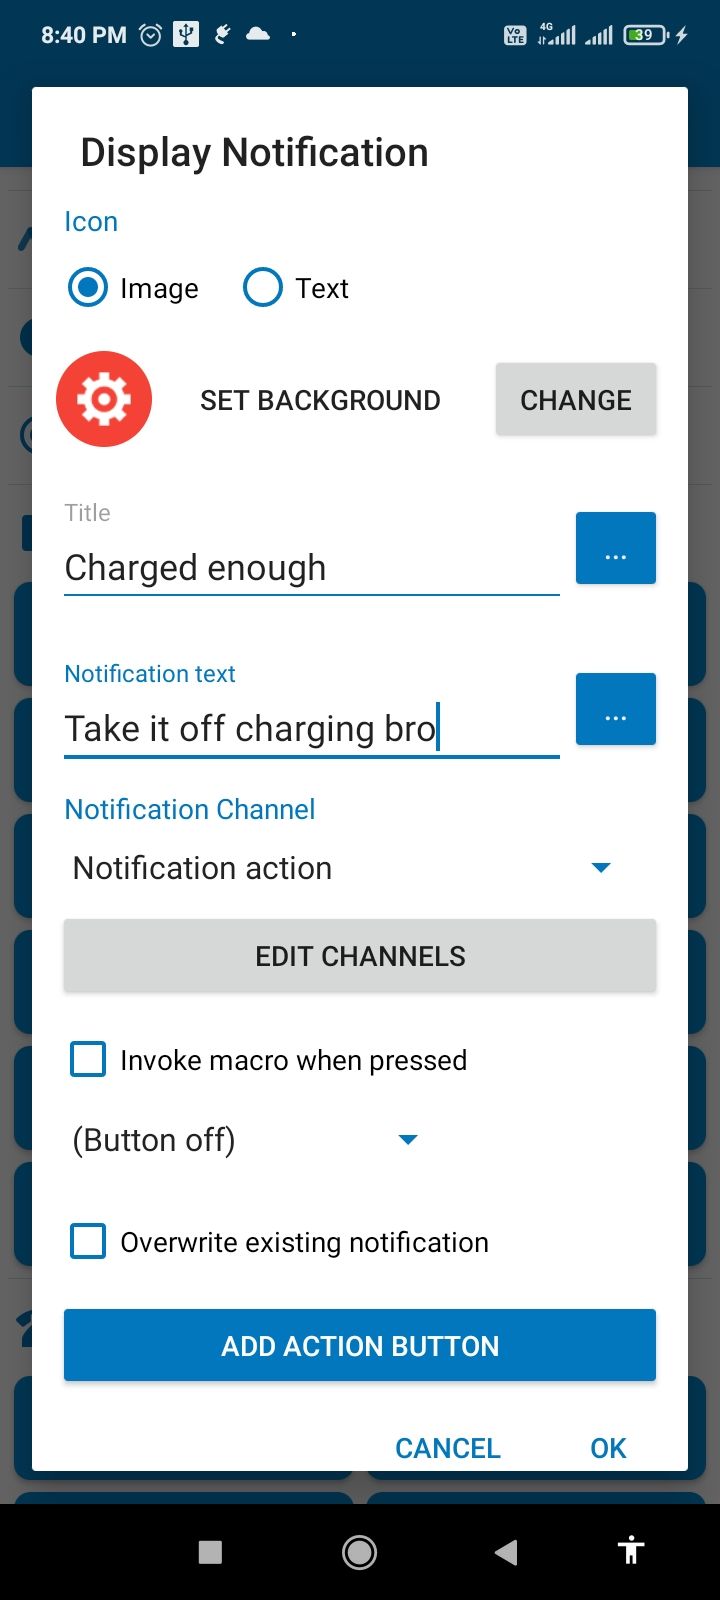
Close
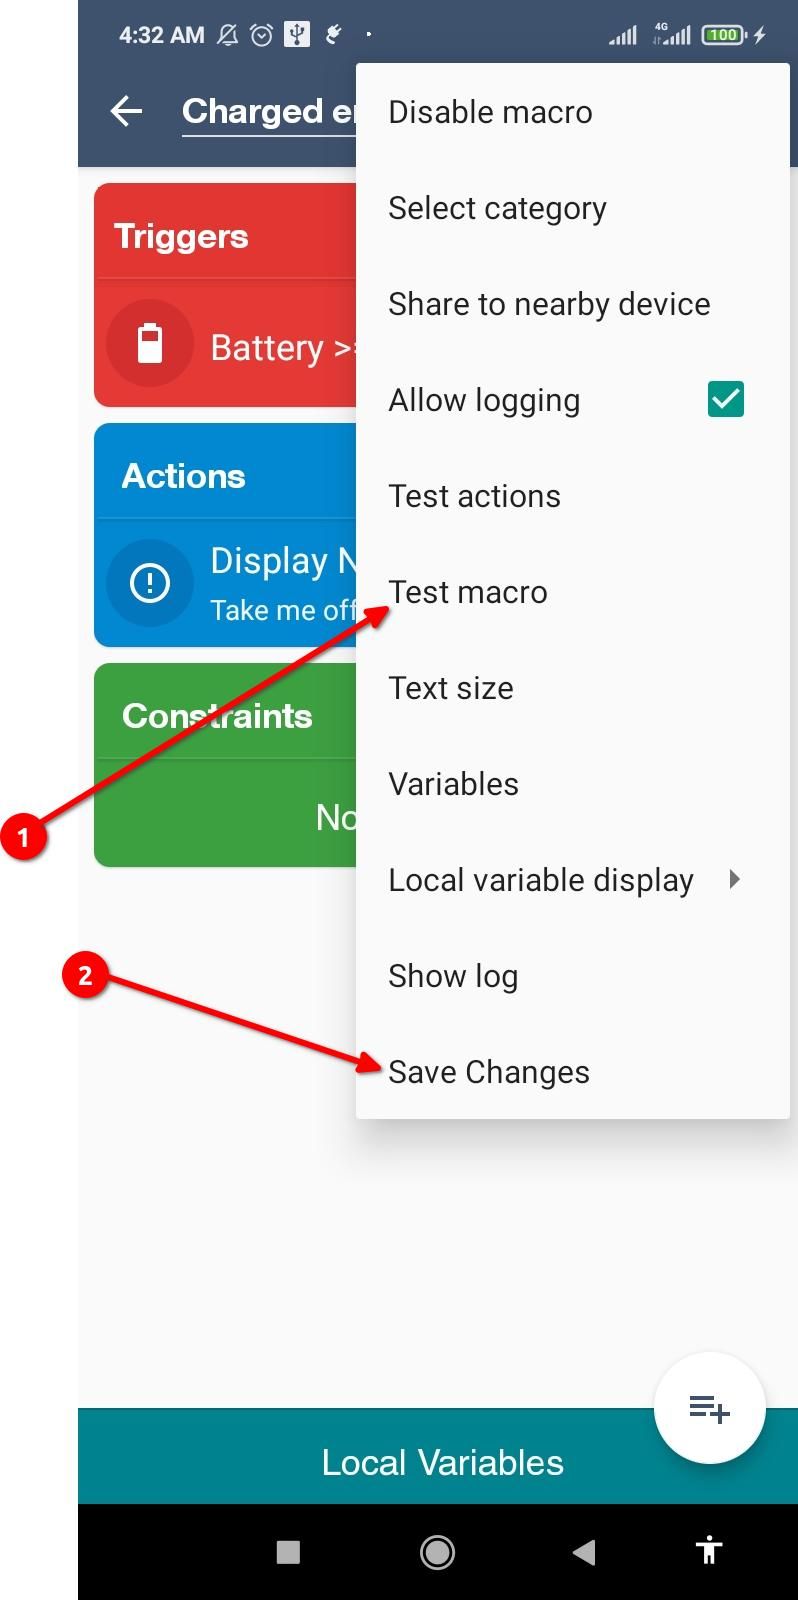
To tie the trigger to the action we just created, give your macro a name. Tap the three-dot menu and tap “Test Actions.” The notification alert you just created should pop up. Finish by tapping “Save Changes.” The new macro is now active.

Close
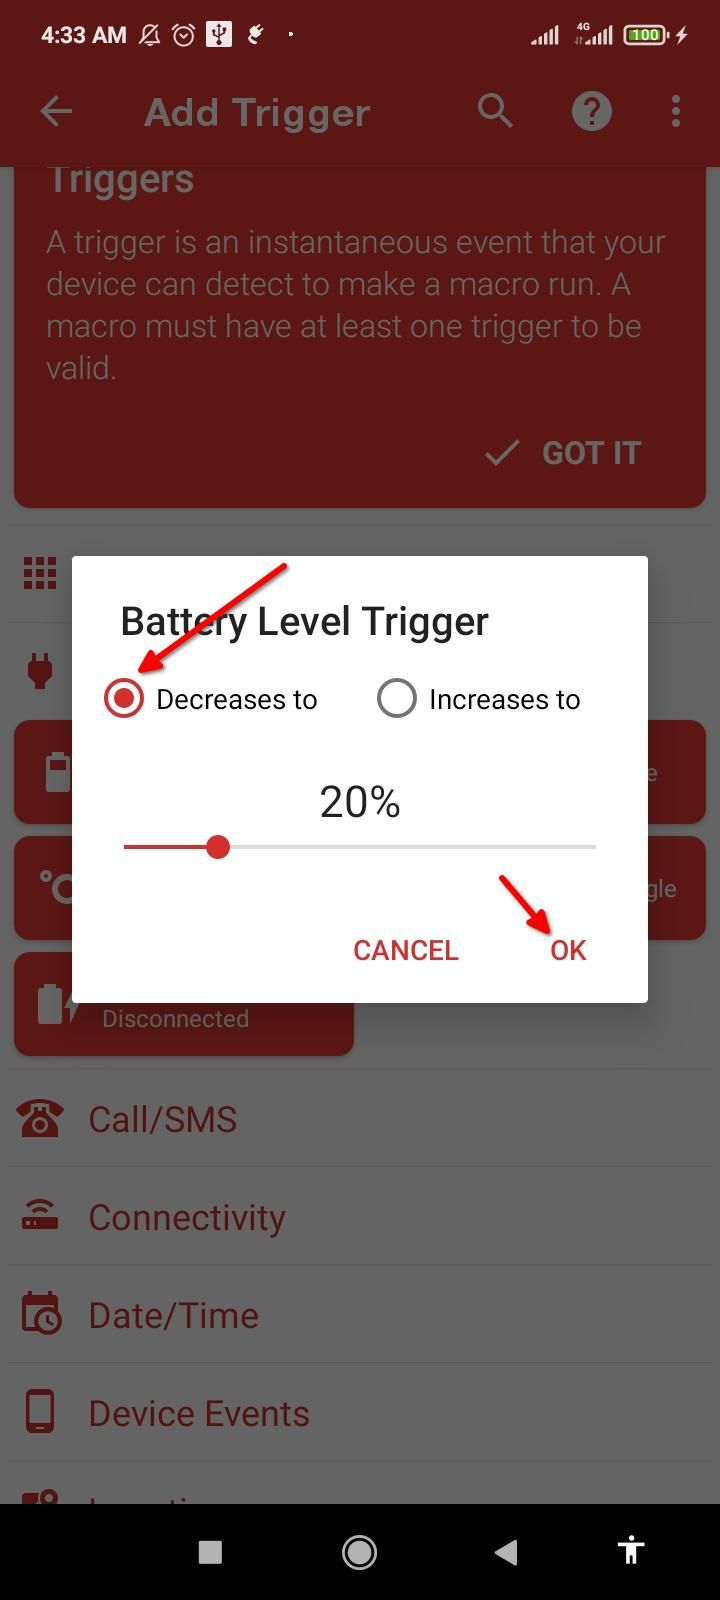
We need a second macro to set up the low-battery alerts. Happily, the steps are almost identical. Once again, tap the “Add Macro” tile on the MacroDroid home. Then, touch the plus icon next to Triggers and expand the Battery/Power menu. Select “Increase/Decrease” and tap “OK.” Keep “Decreases to” enabled and drag the slider to 20%. Then tap “OK.”
Close
With the trigger ready, we just need the corresponding action. Tap the plus icon next to Actions and expand Notifications. Now tap “Display Notification” and give your alert a title and text. Give the macro a name, test it, and save it using the three-dot menu button.
Close
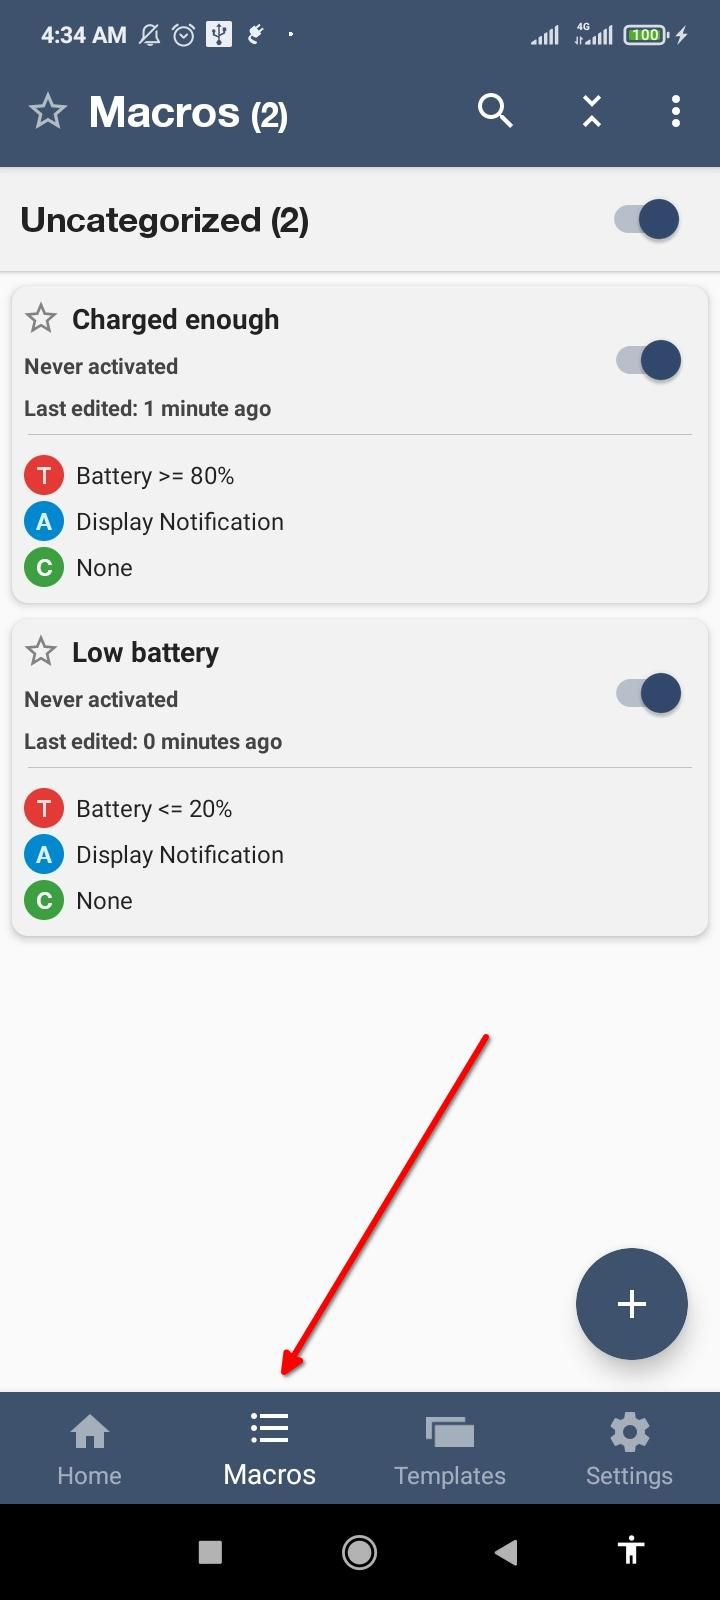
On the bottom menu, go to the Macros tab to find the two newly created macros. Be sure they’re both active and that MacroDroid is running. You can also change the notification sounds for these alerts.
Close
Battery optimization can sometimes interfere with the macros, so I recommend disabling it for MacroDroid. Hop over to the Settings tab and tap “Ignore Battery Optimization.” Finally, tap “Allow.”
Now, you know three creative ways to set up custom charging notifications on Android. Of course, you never have to baby your phone with strict reminders, but loosely sticking to the 80-20 range keeps the battery going for longer.
Also read:
- [New] How to Verify Your YouTube Account, In 2024
- [Updated] Instant Subtitling Hacks for All Your Facebook Videos for 2024
- 2024 Approved From Individual Tracks to Albums Building a Personalized Soundtrack on Web & Mobile
- 2024 Approved Maximizing Earnings on Snapchat Platforms
- 3 Ways to Fake GPS Without Root On Xiaomi Redmi Note 13 5G | Dr.fone
- Detecting Graphics Card Failures: Expert Advice by YL Software
- How to Realme 12 Pro 5G Get Deleted Phone Number Back with Ease and Safety
- In 2024, A Complete Guide To OEM Unlocking on Nokia C300
- Massive Price Drop on LG C2 4K OLED 42 TV - Save $500, Now at Just $800 | Tech News Roundup
- Navigating the Market: Professional Insights on Selecting Your Ideal 32 Television This Year | ZDNET
- Revamped Sonos Interface Brings Enhanced Personalization with Custom Home Panel & Unified Search Feature | TechNews
- Revealed: The Hidden Gaming Power of This Samsung Projector - Save Now with $200 Discount at ZDNet!
- Revolutionize Your Roku Experience: The Ultimate Solution for Finding Lost Remotes, Now Available!
- Samsung's Stealthy Gamification: Projector Turned Game Console with $200 Savings at Checkout - Featured on ZDNet
- Score Huge Savings on Your Fire TV Stick Bundle + Xbox Game Pass for Just $20! Grab It Before the Labor Day Holiday - Exclusive Deal From ZDNET
- Tired of Misplacing Your Remote Control? Learn About the New Revolutionary Solution for Roku Users by ZDNet
- Top 5 iOS Tools to Download Facebook Movies & Clips for 2024
- Title: Prolong Your Android's Life - Tailored Charge Alerts
- Author: George
- Created at : 2025-01-04 22:10:38
- Updated at : 2025-01-06 08:38:10
- Link: https://hardware-tips.techidaily.com/prolong-your-androids-life-tailored-charge-alerts/
- License: This work is licensed under CC BY-NC-SA 4.0.